Add Pages to Performance
Summary
These changes make it easier to add large numbers of pages to Performance, ensuring that you’re able to leverage the full potential of the module across all your relevant projects.
Before you begin
- Confirm that sufficient Performance credits are available.
- Identify the Performance profile and category to use.
Add pages to Performance
- From the main menu, go to Performance > Page Overview.
- Click + Add page in the top-right corner of the page. A dialog box opens.
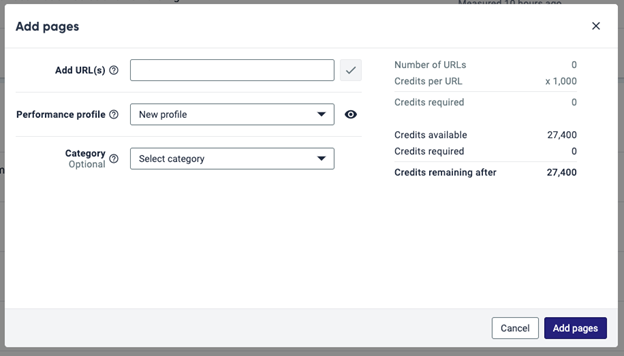
- Enter the URLs of the pages to add to Performance. Note: Select the checkmark icon or press Enter to enter additional pages.
- Select a Performance profile to use to set up the measurements for these pages. You can read more about Performance profiles here.
- Choose a category. Categories allow you to sort and divide your pages into groupings based on projects, page type, and other criteria. These categories are then shown on the Page Overview.
- Click Add pages.
What happens to Performance credits
A calculation on the right shows the credits used for adding these pages. Each time you add more pages to Performance, it reserves more credits, and each time you remove pages from Performance, it refunds the credits.
Ask your Siteimprove contact for more information regarding expanding the credits available on your account.
Did you find it helpful? Yes No
Send feedbackSorry we couldn't be helpful. Help us improve this article with your feedback.