Setup MCP Server in VS Code with GitHub Copilot Extension
Overview
Set up the Siteimprove MCP server in Visual Studio Code by adding the server configuration to the mcp.json file, starting the server, and authenticating with your Siteimprove Platform Credentials.
Prerequisites
- Visual Studio Code
- GitHub Copilot Extension
- Siteimprove Platform Credentials
Setup MCP Server in VS Code
- Open View > Command Palette in the top menu.

- Search for MCP: Open User Configuration it should pull up the mcp.json file path.
- In the mcp.json file copy the following code into the body of the Json file as shown below
- Save the file.
- Reload VS Code (if necessary).
Code to enter:
{
  "servers": {
    "accessibility": {
      "type": "http",
      "url": "https://mcp.siteimprove.com/mcp",
      "oauth": {
        "clientId": "8985f072-09c6-4284-9cfa-37f24b730182"
      }
    }
  },
  "inputs": []
}
Screenshot of file path and code: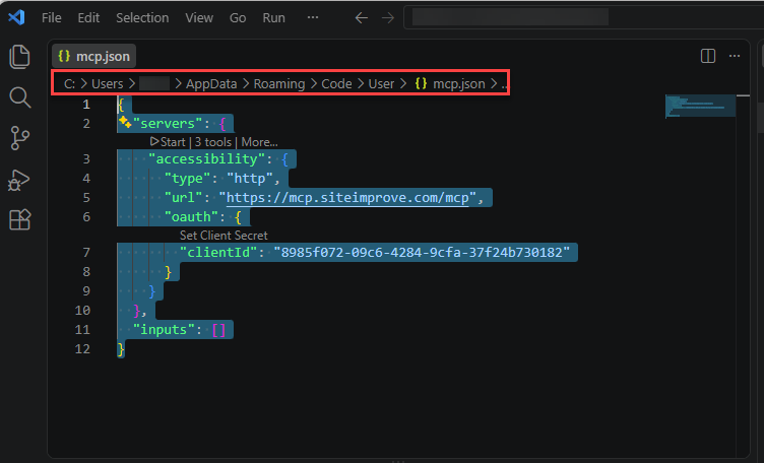
Authenticate into the MCP server in VS Code
- Open the Extensions panel on the lefthand side in VS Code.
- Under the MCP Servers - Installed area you should see accessibility shown if the above steps were completed to install the MCP server.
- Under the Settings (cog wheel icon) menu select Start Server.
- The Output panel should open, then you will see a prompt open that askes The MCP Server Definition accessibility wants to authenticate to identity.siteimprove.com.
- Select Allow button.
- Another prompt will come up asking Do you want Code to open the external website?
- Select Open button.
- Your default browser will open up a tab or window asking for consent for the MCP server to access the MCP server and authenticate.
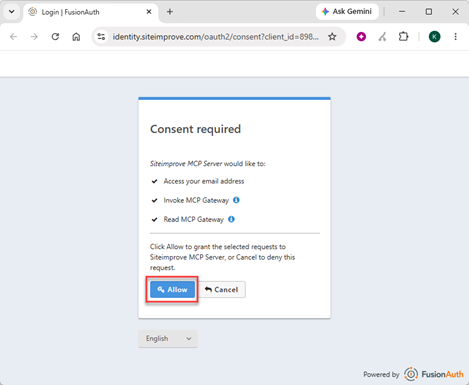
- Select Allow.
- It should sign you in or ask you to sign in using your Siteimprove Platform Credentials and ask to reopen Visual Studio Code. Select Open Visual Studio Code button. If that option doesn’t happen, then close the page and go back to VS Code.
Did you find it helpful? Yes No
Send feedbackSorry we couldn't be helpful. Help us improve this article with your feedback.