AEM CMS Plugin Usage
Summary
After installation and configuration, have the Siteimprove Account Owner log into the plugin first and accept the terms and conditions. Then follow the instructions to use the New or Old Plugin Experience, to run Prepublish (Content) checks, to check Experience Fragments, and to set up checks to work with AEM Workflows.
Instructions
First login and terms acceptance
After installing and configuring the plugin, the Siteimprove Account Owner should be the first to log into the plugin in the CMS with their Siteimprove platform credentials and agree to the terms and conditions.
You can read the Siteimprove CMS plugin terms and conditions and approve them as an Account Owner under Settings > Integrations > CMS Plugin Setup.
You should then be able to use the plugin if everything is installed and configured correctly. Reference the documentation on how to use the plugin to determine if it behaves as expected. If features are not working, reference the Troubleshooting section.
Documentation on How to Use the Plugin
Features unique to the AEM plugin
There are a couple of features unique to the AEM CMS Plugin that you can configure and use.
Adobe Experience Fragments Prepublish checks
With version 3.0.0 of the plugin and after it, there is the option to check Adobe Experience Fragments prior to publishing if you have a Prepublish subscription. Add the Experience Fragments path under the Plugin Active Paths tab. Typically, the path is /content/experience-fragments.
- In the AEM Experience Fragments console, select the fragment and select Edit.
- Select the Siteimprove icon in the fragment editor toolbar. If the plugin overlay is open, close it first.
AEM Prepublish Checks with the New Plugin UI
- In the AEM Sites Console, select the page and select Edit.
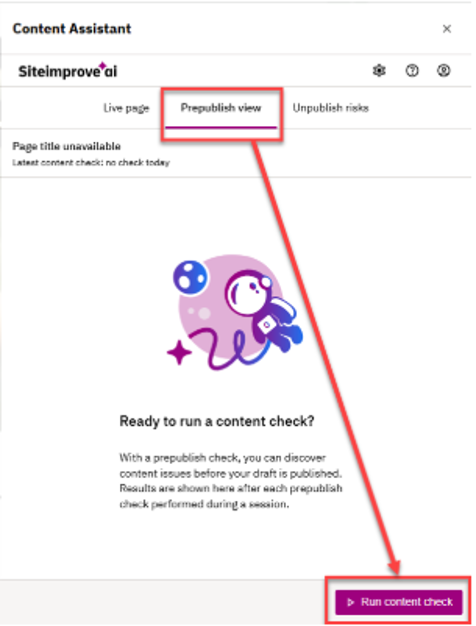
- Select Run content check under the Prepublish view tab in the plugin overlay.
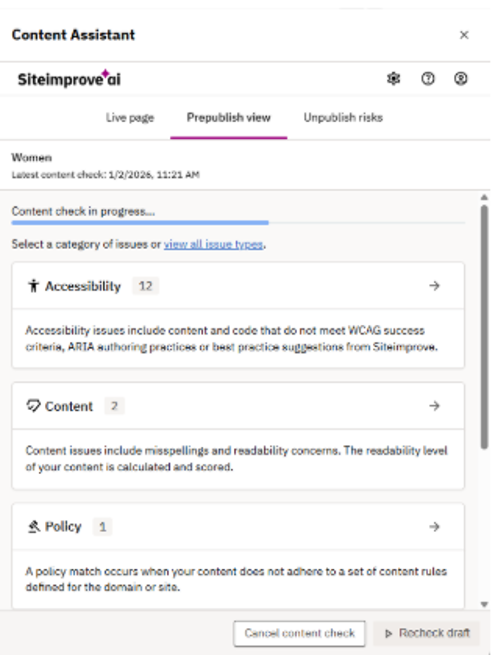
- The check is performed under Prepublish view, where a status bar shows progress.
AEM Prepublish Checks with the Old Plugin UI
- In the AEM Sites Console, select the page and select Edit.
- Select the Siteimprove icon in the page editor toolbar.
- A blue bar shows processing status. You can wait or allow the check to continue in the background.
- Expand the results table to review issues, occurrences, highlighting options, and descriptions.
Workflow Prepublish and Unpublish check sample flows
Integrate Siteimprove checks into AEM workflows to notify authors, assign tasks, and help prevent a certain threshold of critical issues from being published. Review the Adobe Experience Manager workflow documentation for more on workflow capabilities.
Next Steps
If you are running into issues with the plugin we suggest reviewing the following articles next:
Did you find it helpful? Yes No
Send feedback