How to Run a Prepublish Check in CMS plugins with the New Plugin Experience (UI/UX)
This page goes over the steps to run Prepublish, AKA Content Checks, within Premium and Siteimprove-provided CMS plugins with the New Plugin Experience or UI/UX. For how to use the standard plugin, without Prepublish, please reference this article: How to navigate the New Siteimprove CMS Plugin. You can read more about Prepublish checks in general in the article Prepublish content check: How to ensure quality content on your site.
We only cover how to run Prepublish checks for the Premium and Siteimprove-provided plugins, as we support those plugins. Please reference the plugin user or installation guides you can find under links to the individual Vendor or Community-provided plugins on the CMS plugins page to see how to do Prepublish checks for plugins that are not Siteimprove-provided.
- Prerequisites for Prepublish
- Overall Prepublish Check Usage
- How to run a Prepublish check by CMS plugin
Prerequisites for Prepublish
- Siteimprove Subscription to Prepublish.
- If you are unsure about your subscription status, check with your Customer Success Executive.
- Installation and Configuration of a CMS plugin that has Prepublish check capabilities in your CMS authoring environment.
- For what plugins have Prepublish and how to install or configure the plugins, please refer to the installation and configuration guides for each plugin on the CMS plugin marketing site page or in the Help Center. Just search for the plugin name to see if there is a Help Center article for it. Also refer to Prepublish content check: How to ensure quality content on your site.
- Scanning the site that you are trying to check in the Siteimprove Platform.
- Even if you are only doing Prepublish checks, you must install and configure the full CMS Plugin that works with your CMS and checks against live published content on your site as well. Even if you remediate errors before publishing, errors can still come up down the road with changes made to the site, so it can be useful to have both options available.
- You need to save a draft of a page to check it via Prepublish.
- We can't check your content of pages before they are published until they are saved in a draft state. Please refer to your CMS provider's documentation on how to save things in a draft state. Also, for most plugins, you will need to be in a "Preview" mode to view the Prepublish check results and highlighting on the page.
- Login to the CMS plugin
- To login to the plugin, select the plugin overlay and login with your Siteimprove platform credentials. The look of the CMS's can be different, but the screenshot below shows generally how this works.
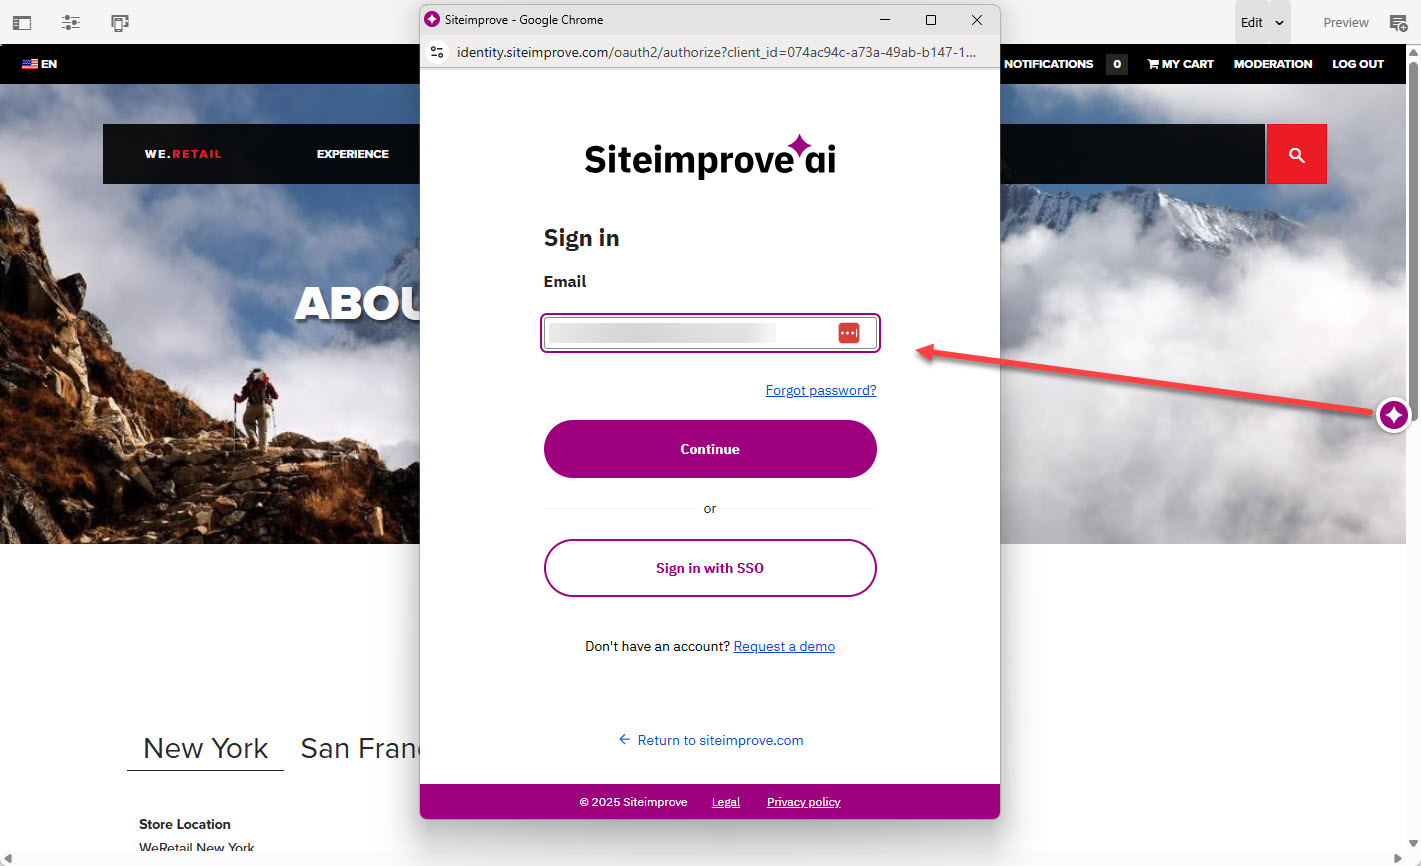
- To login to the plugin, select the plugin overlay and login with your Siteimprove platform credentials. The look of the CMS's can be different, but the screenshot below shows generally how this works.
How to run Prepublish checks for the CMS plugins with the new UI in general
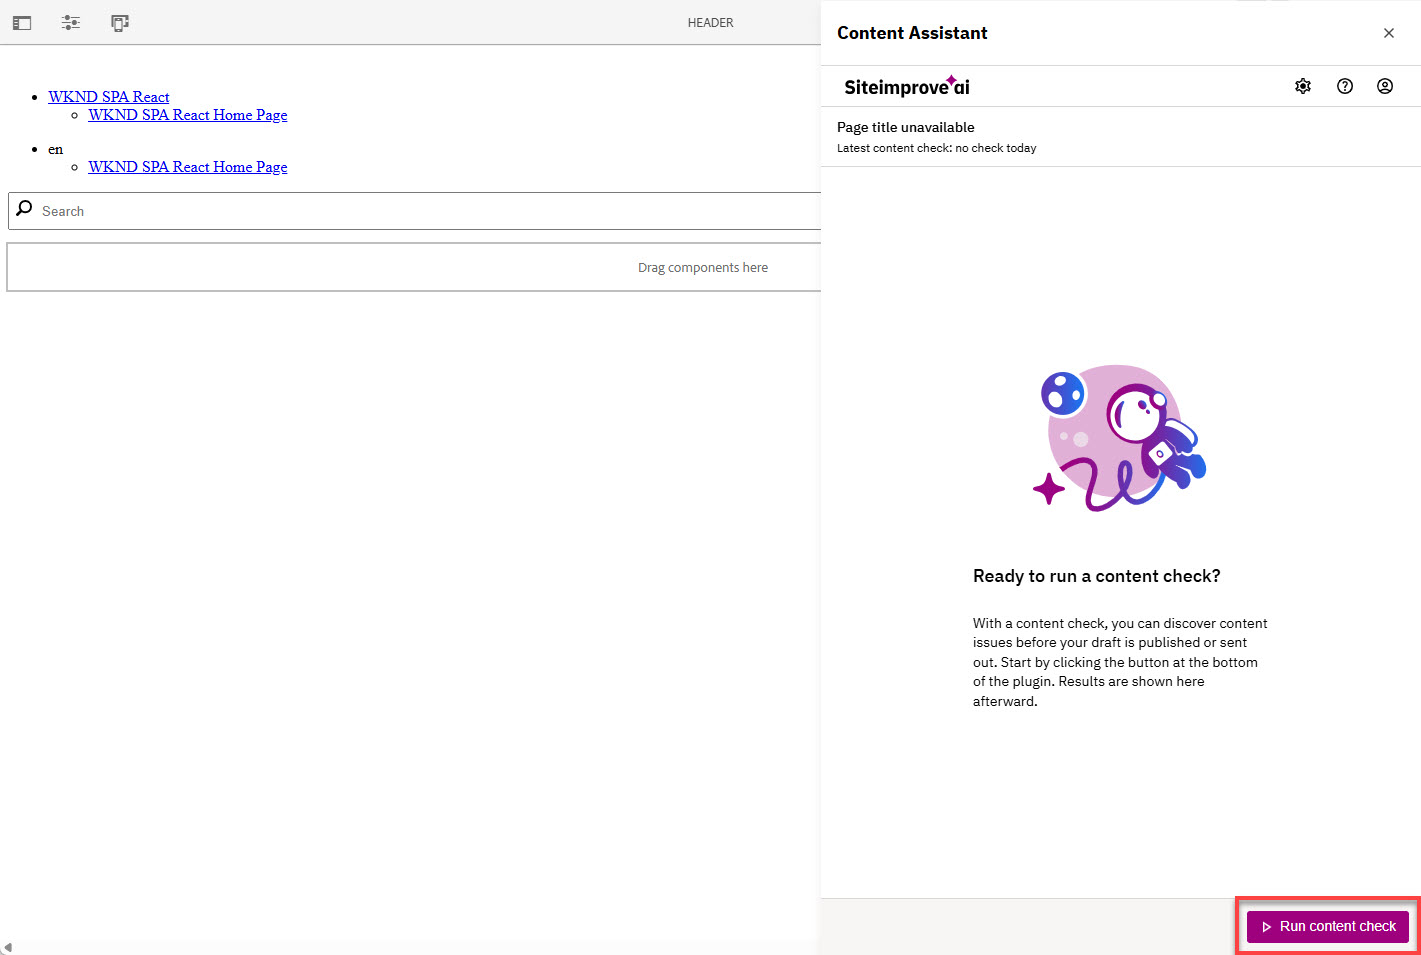
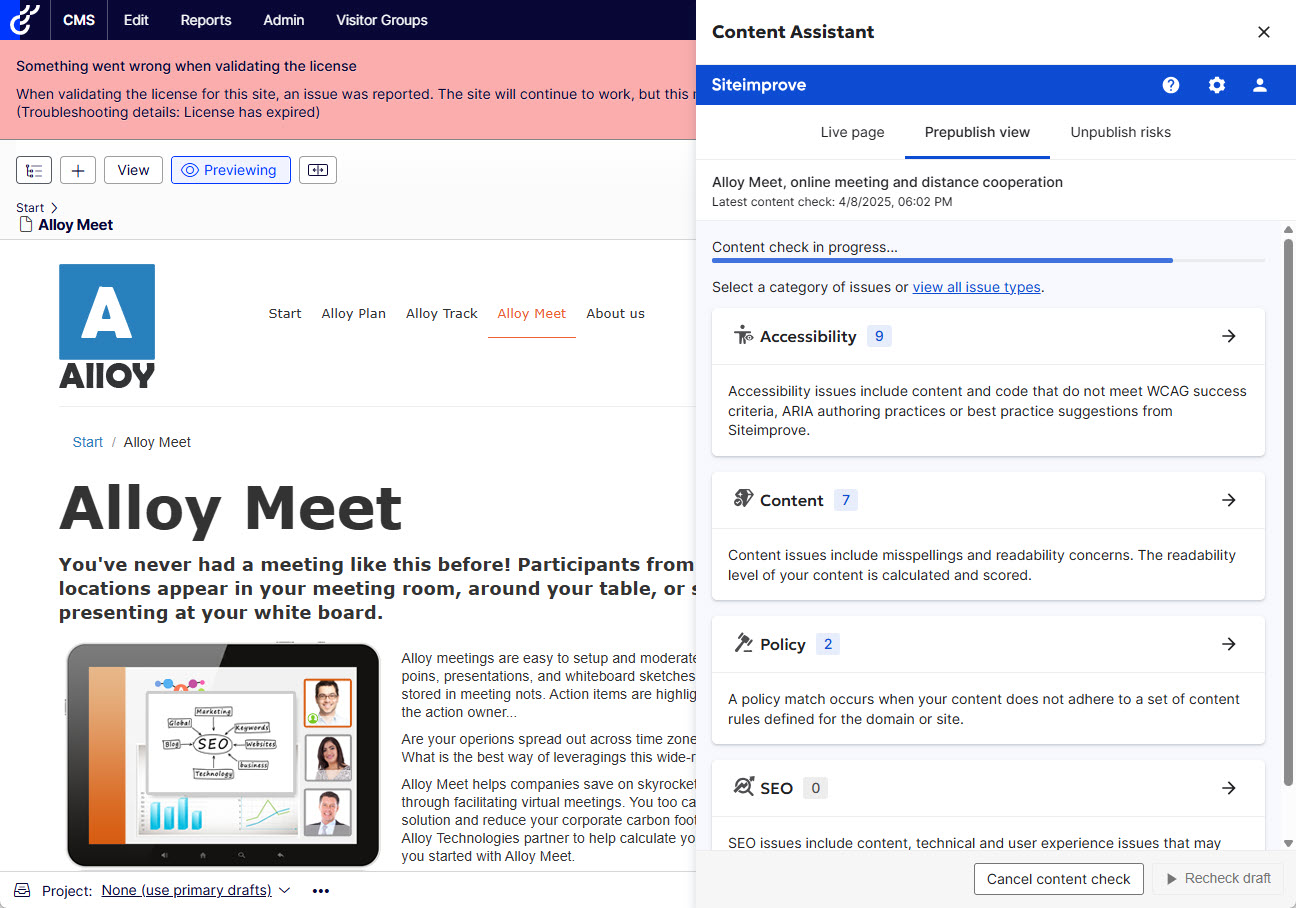
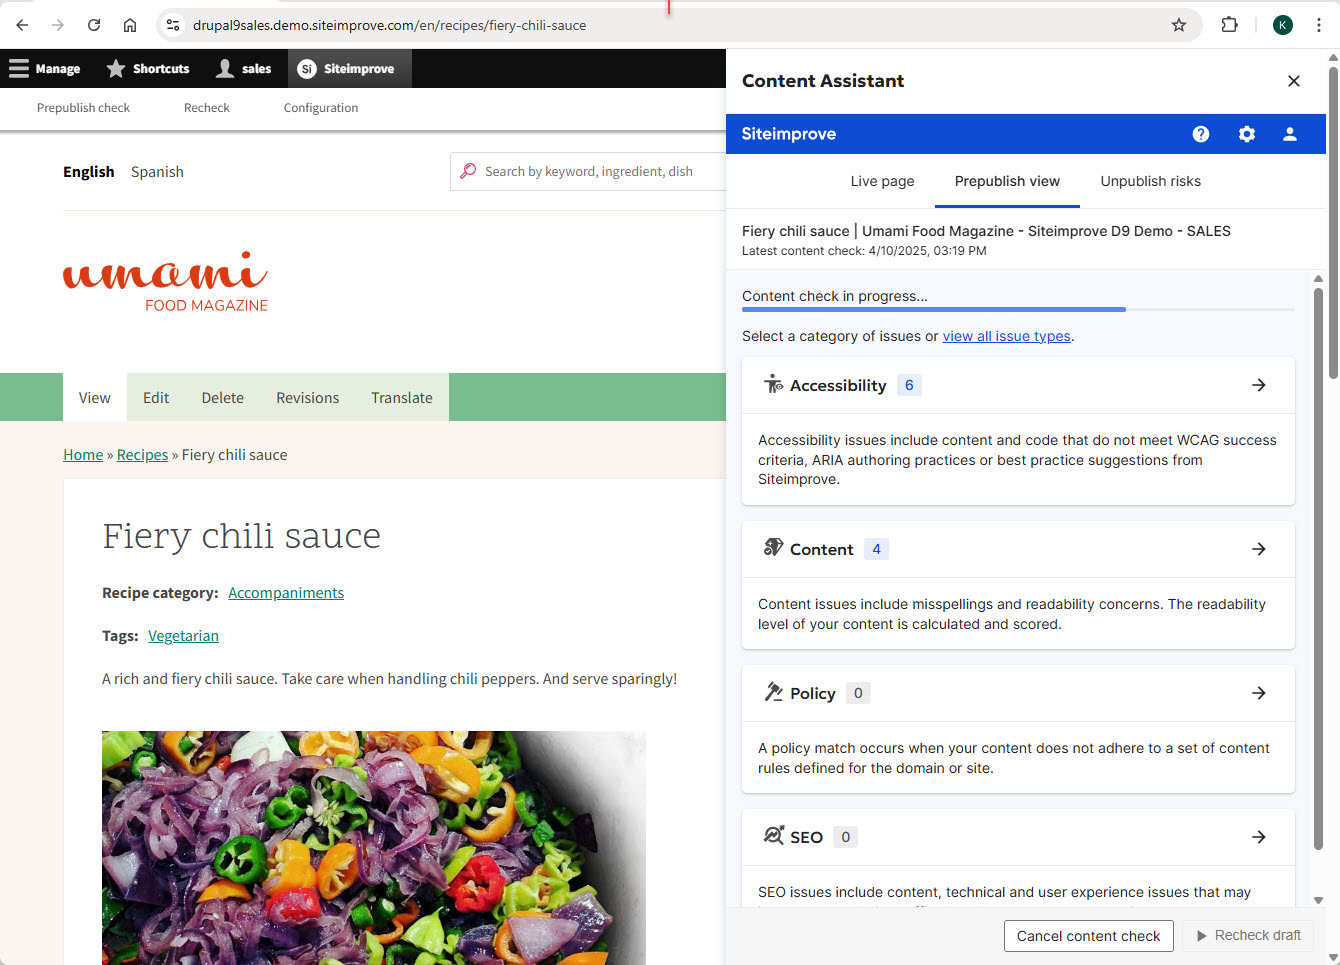
Typically, to run a Prepublish, AKA "Content Check," in the plugins, you have to navigate to an editing page in the CMS and view the Preview mode of the page (if there is a separate preview mode). Then you would select a Prepublish or Run Content Check button in the navigation menu or in the plugin overlay under Prepublish view to start the check. The Prepublish check will then start running and show a status bar under the Prepublish view tab in the plugin.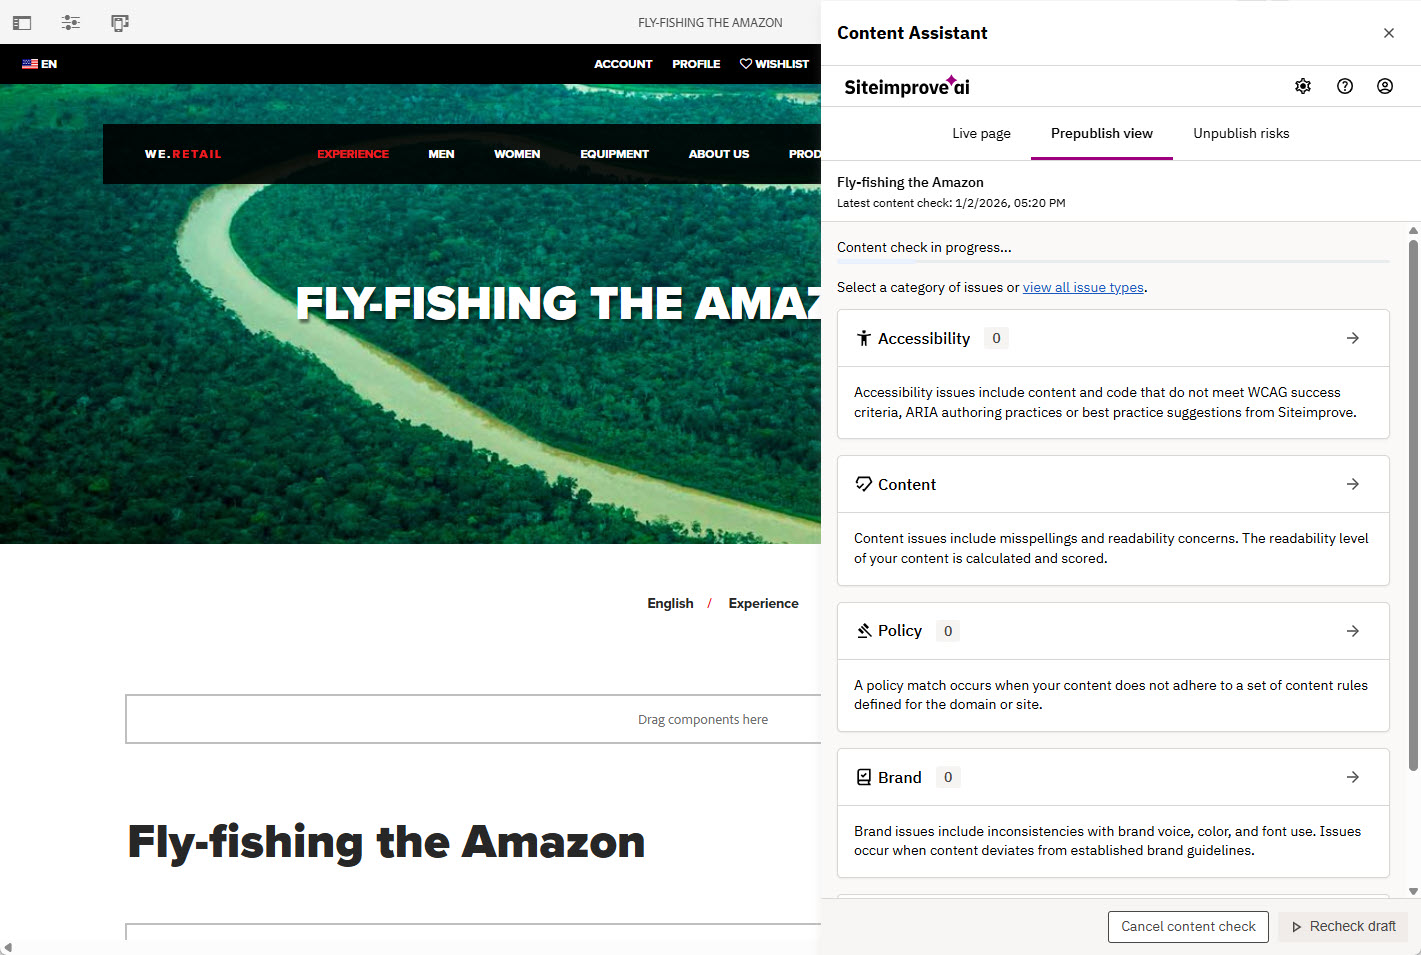
Overall Prepublish Check Usage
Each plugin has a bit different steps to complete the checks, but they all share a common overlay and capabilities within the Prepublish check tab of the overlay.
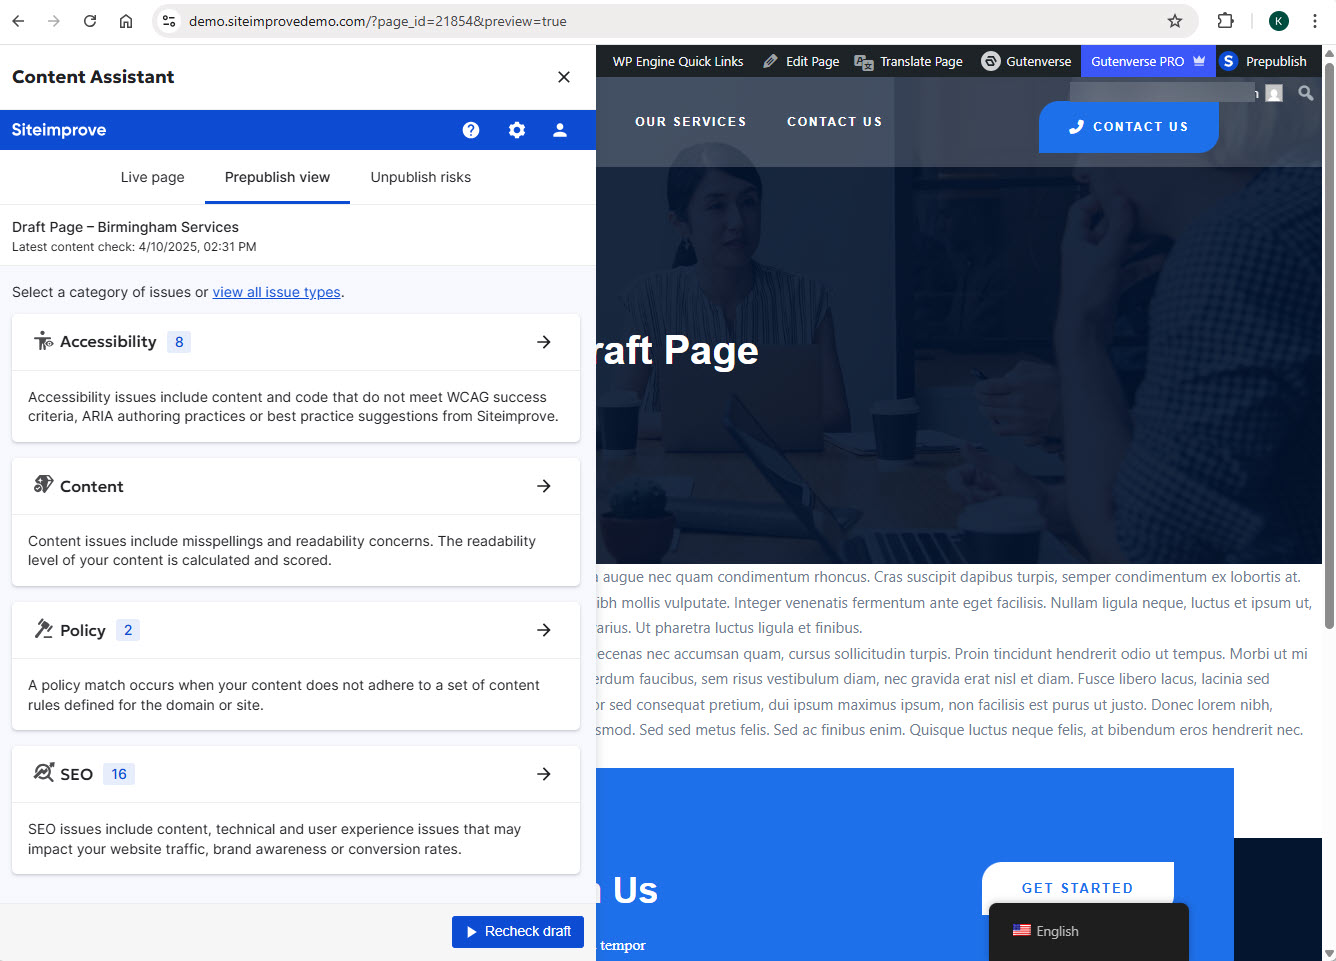
Prepublish view tab
There are two ways to view issues on the live page tab: Grouped View (default) and List View.
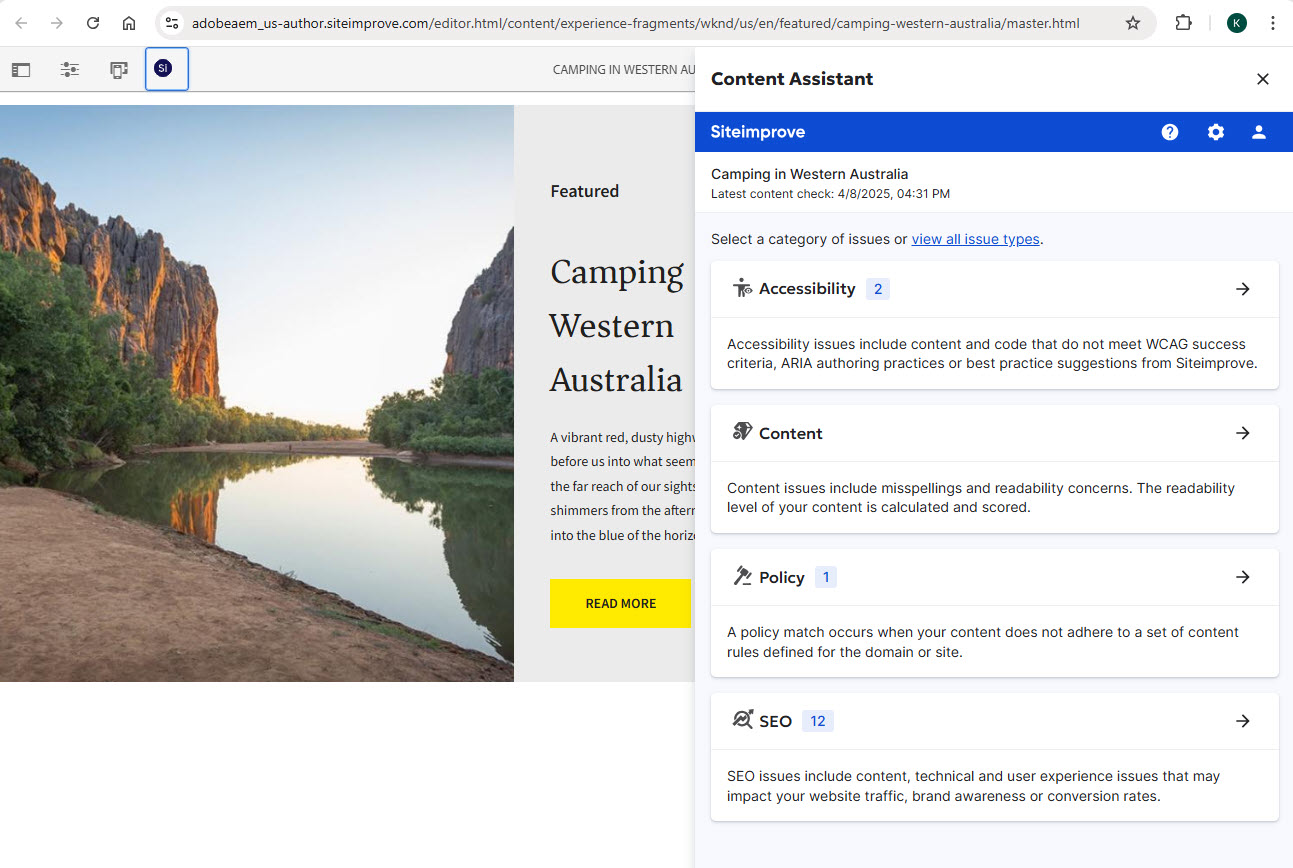
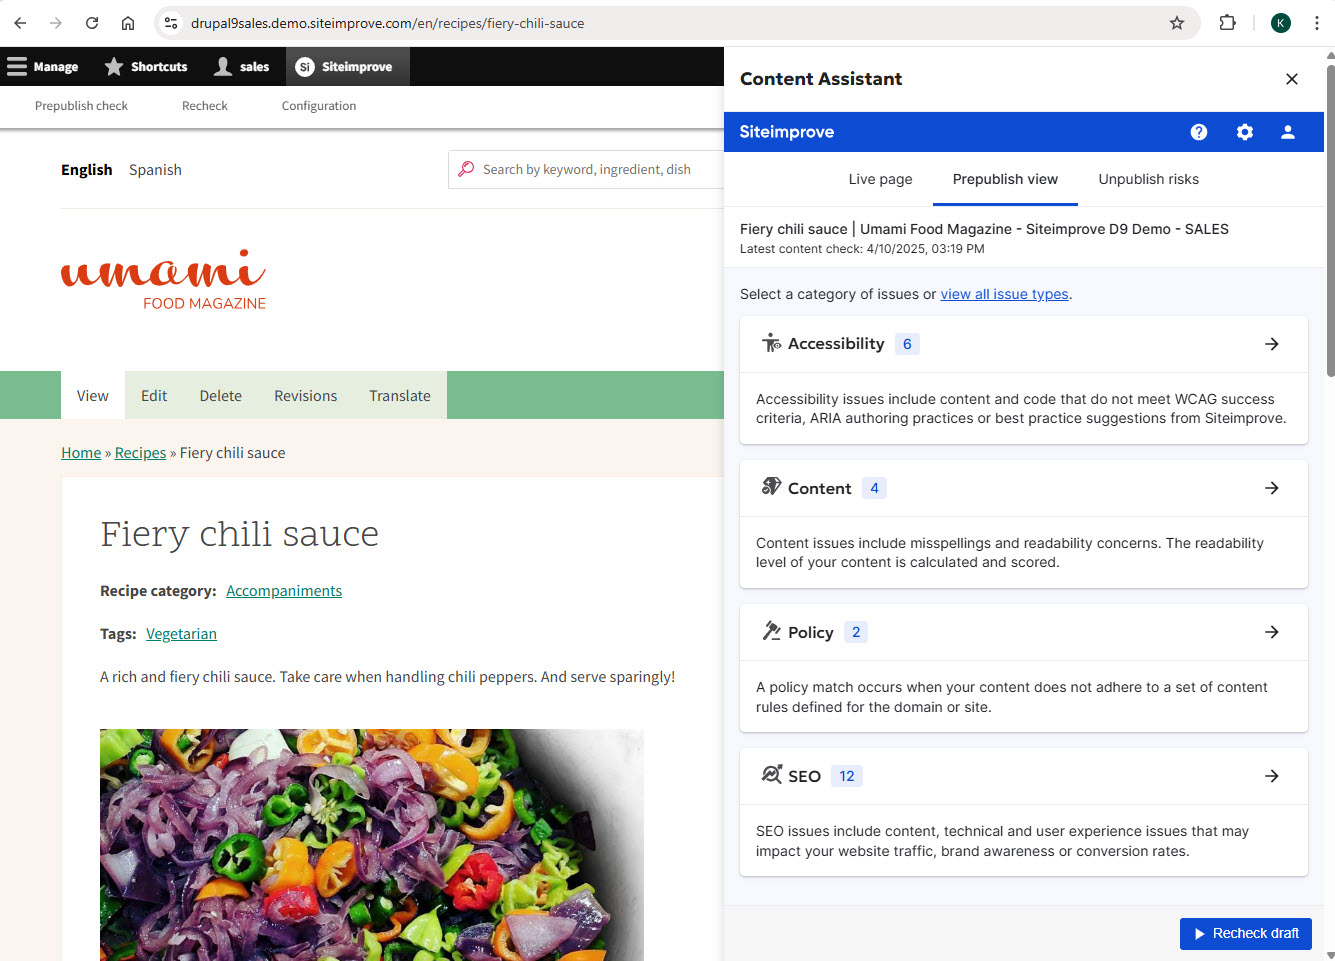
Grouped View (default)
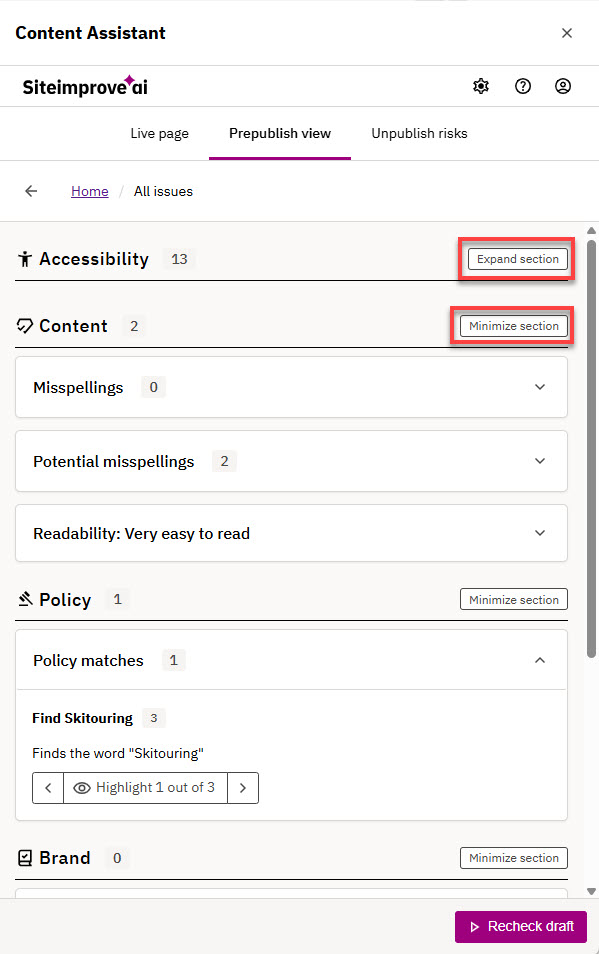
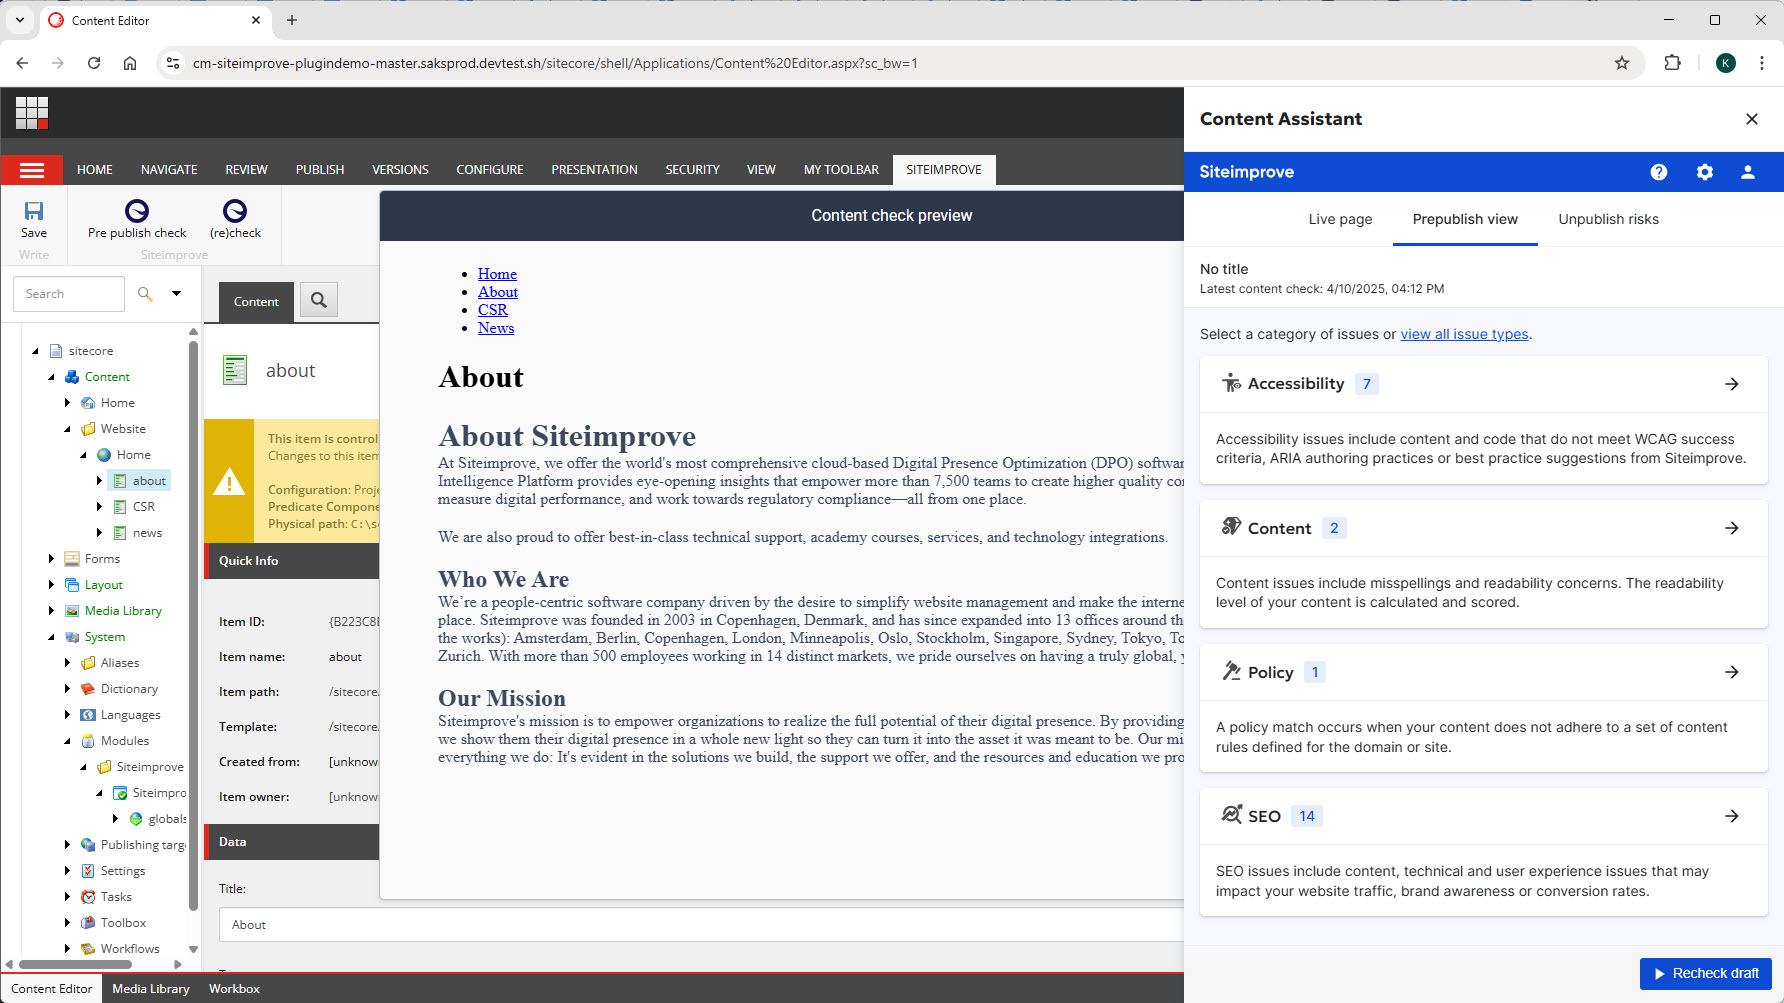
Grouped view organizes issues by category (Accessibility, Content, Policy, SEO, etc).
If you select the arrow icons next to the issue, you can view more details on the particular issue. Each issue includes a description of the issue, the number of occurrences of the issue, and some of them have the option to highlight the issue if it is visible in the preview area.

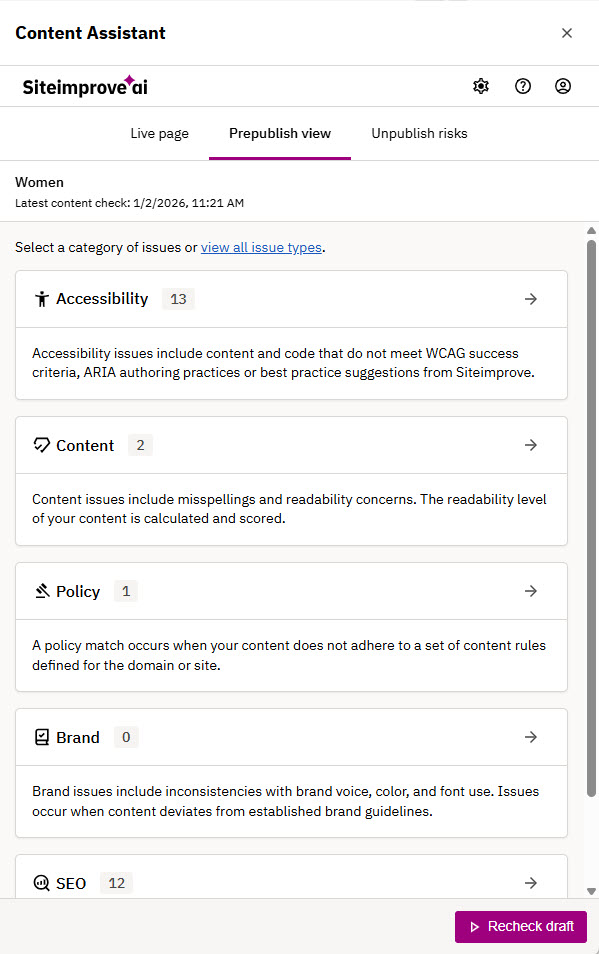
List View
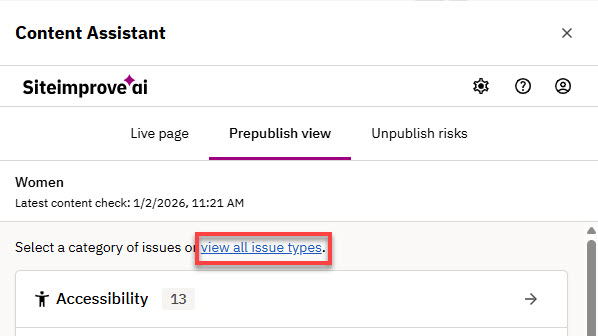
From the default "Group View" you can select "List View" by selecting the "view all issue types" link.
"List view" shows all issue types. If you select the arrow icons next to the issue, you can view more details on t,he particular issue. Each issue includes a description for context, the number of occurrences of the issue, and some have the option to highlight the issue if it is visible in the preview area. You can use the "Minimize section" or "Expand section" buttons to focus on certain areas of issues. Filtering, like with the "Live page" tab, is not yet available for this view in Prepublish, but it may be down the road.
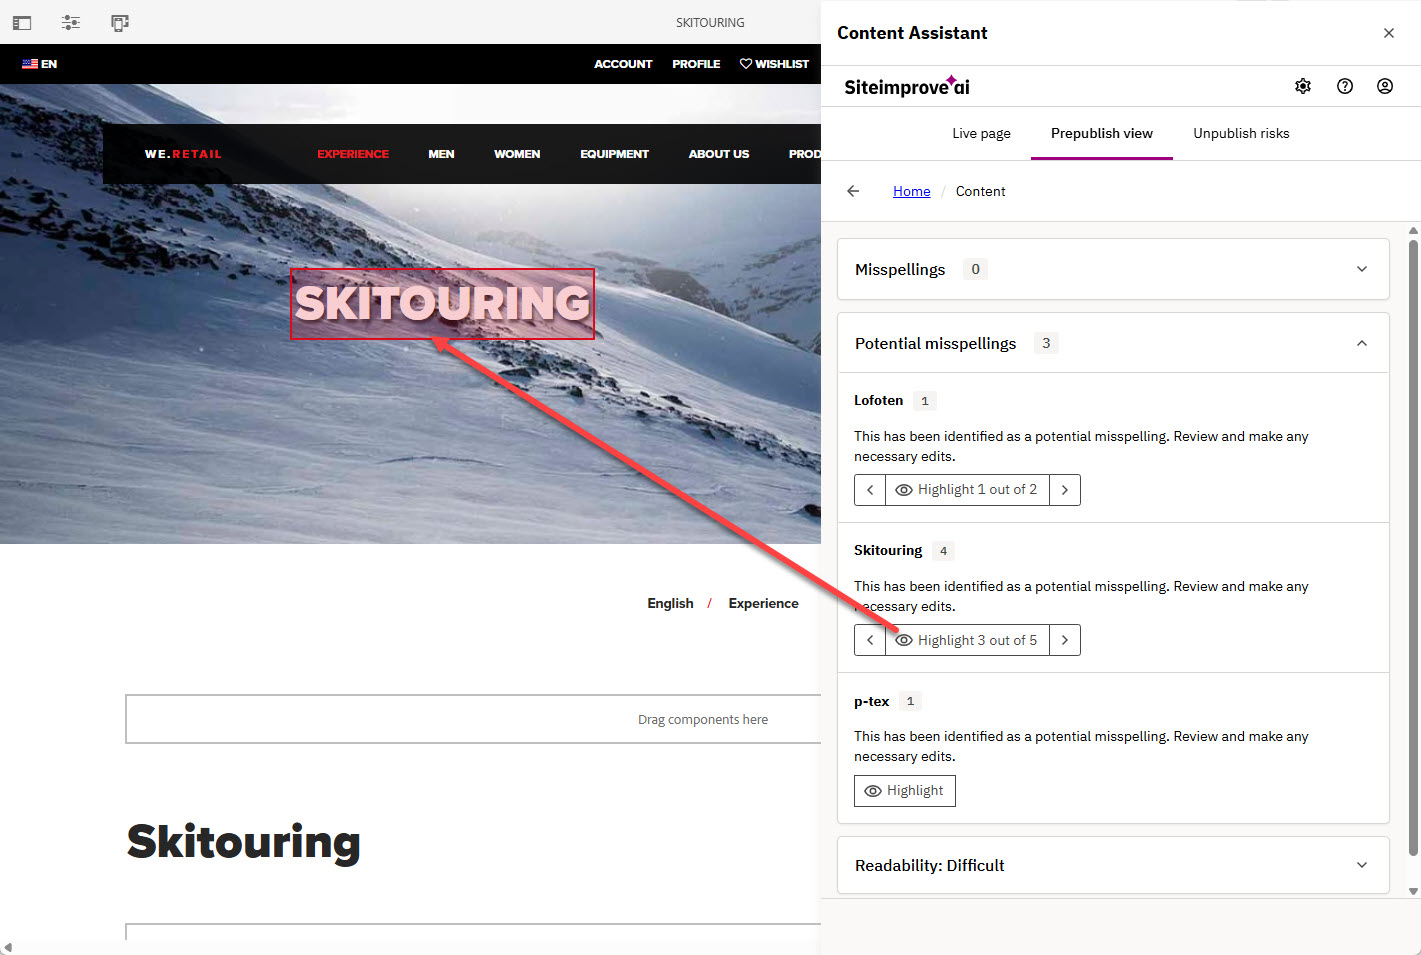
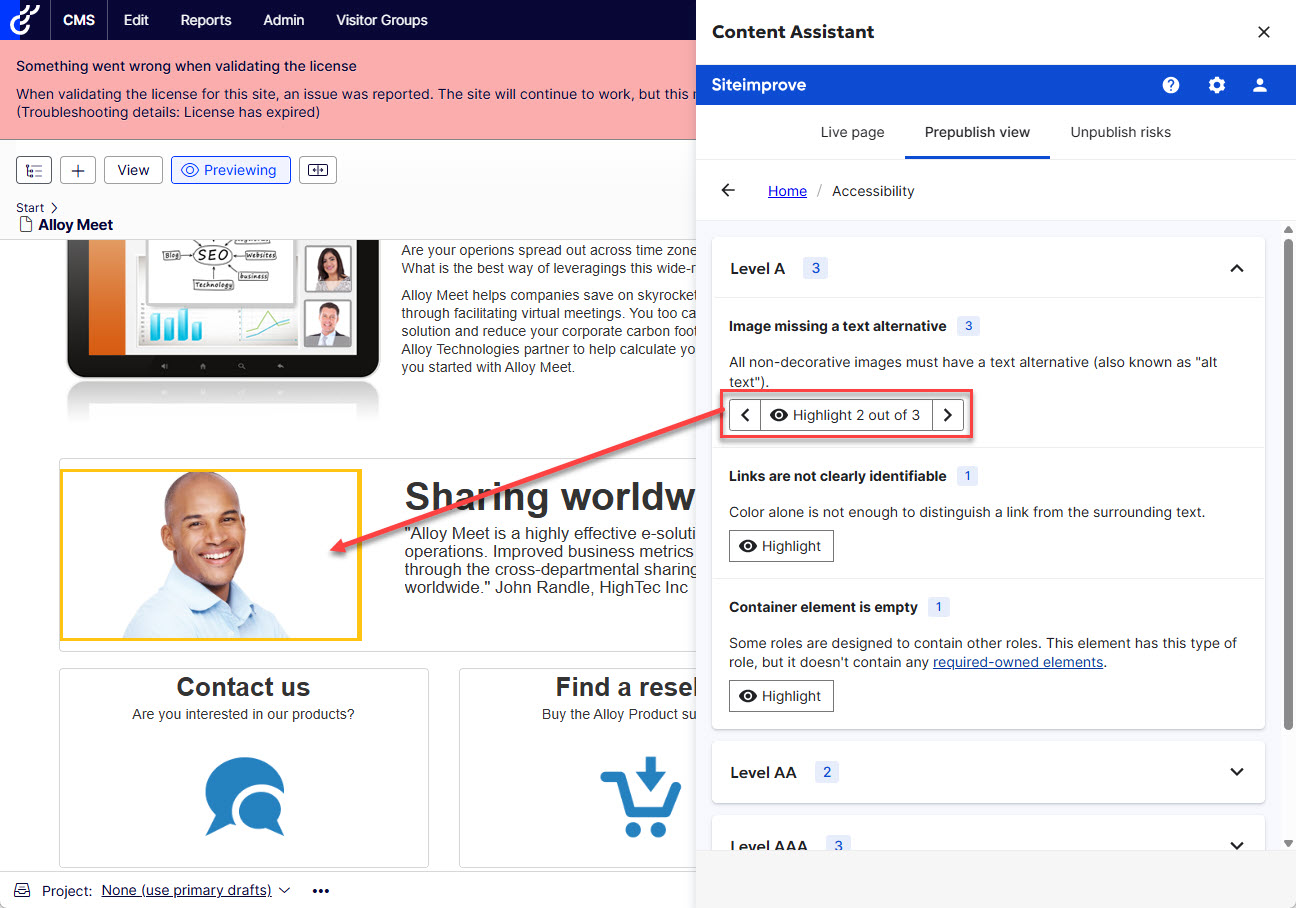
Highlighting
If occurrences of issues are visually visible to highlight in the CMS preview area, they may have the option to highlight the occurrences of the issues available in the plugin. To highlight items, select the highlight button with the eye icon. If there are several occurrences, use the arrow buttons to highlight the other occurrences.
Checks available
The checks available depend on the Siteimprove features within your subscription and your CMS software. Generally, the following checks are available.
Accessibility
- Level A, AA, and AAA issues
- Level A, AA, and AAA potential issues
- WAI-ARIA authoring practices
- Accessibility best practices
Content
- Misspellings
- Potential Misspellings
- Readability
Policy
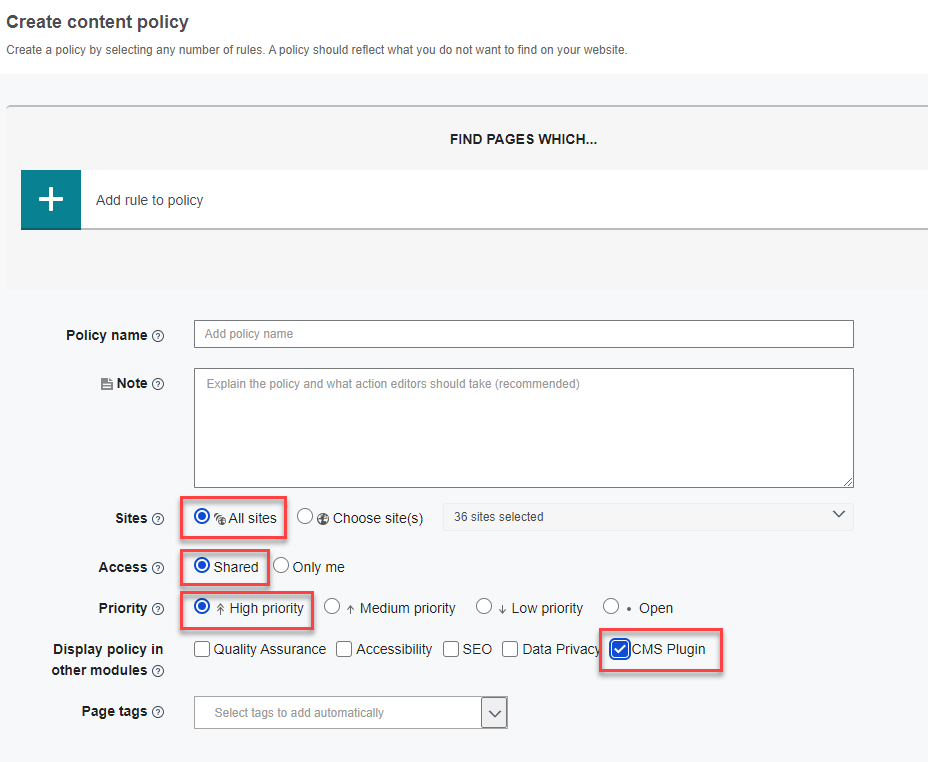
- Content Policy matches - marked as a 'High priority,' 'CMS Plugin,' 'Shared', and enabled for 'All sites' within the Siteimprove platform. Media and Document Policies are not included at this time.
SEO
- SEO checks are in beta for the New Plugin Experience so if you want to see these checks in the plugin reach out to technical support to put in a request to enable SEO checks in the plugin.
Brand Consistency
- Displays brand issues, including inconsistencies with brand voice, color, and font use, if you have a subscription to Brand Consistency. Read more about Brand Consistency here: Brand Consistency.
Analytics
- Unfortunately, Analytics data is not yet available in the New Plugin Experience. It should be available for the Old Plugin Experience until it is available as a feature of the New Plugin Experience. See How to Disable the New Plugin Experience for how to switch back to using the Old Plugin Experience.
Decision handling
As the Prepublish (Content Check) utilizes a different checking process than the checks done in the Siteimprove Platform of the live published pages, at this time, only account-level decisions are reflected, and page-level and site-level decisions do not carry over. You also cannot make decisions on issues within the plugin or Prepublish checks, decisions need to be made within the Siteimprove Platform.
Refer to the table below for a breakdown of the decisions available within the Siteimprove Platform, "Live view" ("This page") tab in CMS Plugins, and Prepublish (Content Checks).
| Feature | Siteimprove Platform | Live view (This page) tab in CMS Plugins | Prepublish (Content Checks) |
|---|---|---|---|
| Decision Levels |
|
|
|
| Reflecting Decisions | All decision levels apply, including approved spellings, ignored policies, etc. | Most decisions are reflected, such as Spelling and Policy decisions. Accessibility and SEO decisions have some limitations. | Only account-level decisions are reflected; page-level and site-level decisions do not carry over. |
| Actionability | Full decision-making capabilities (e.g., ignore issues, approve spelling). | Read-only; requires users to make decisions in the Siteimprove platform. | Read-only; decisions must be made in the platform (no decision-making in Prepublish). |
| Quality Assurance: Spelling Checks | Approved/misspelled words are respected across all decision levels. | Approved and misspelled words are reflected with some refreshing required. | Only account-level and page-level decisions for spelling are respected; site-level decisions are not applied. |
| Quality Assurance: Broken Links | All broken link decisions are applied. | Decisions on broken links don't display at this time. | Broken links are not displayed in Prepublish checks at this time due to the impact on performance. |
| Accessibility Checks | Full support for accessibility decisions. | Accessibility decisions are not reflected due to a lack of site-level or page-level context. | Accessibility decisions are not reflected due to a lack of site-level or page-level context. |
| Policy Checks | Policy decisions at all levels are fully applied (site, page, account). | Policy decisions at page-level are reflected if the policy is marked correctly in the Siteimprove platform to display in the plugin ('CMS Plugin,' 'Shared', and 'All sites' need to be checked). | Only account-wide policy checks are run in Prepublish; decisions don't come through, as you can only ignore policies at the page-level. |
| SEO Checks | SEO insights reflected, but as decisions are not available for SEO, they are not supported. | SEO insights reflected, but as decisions are not available for SEO, they are not supported. | SEO insights reflected, but as decisions are not available for SEO, they are not supported. |
How to run a Prepublish check by CMS plugin
Adobe Experience Manager
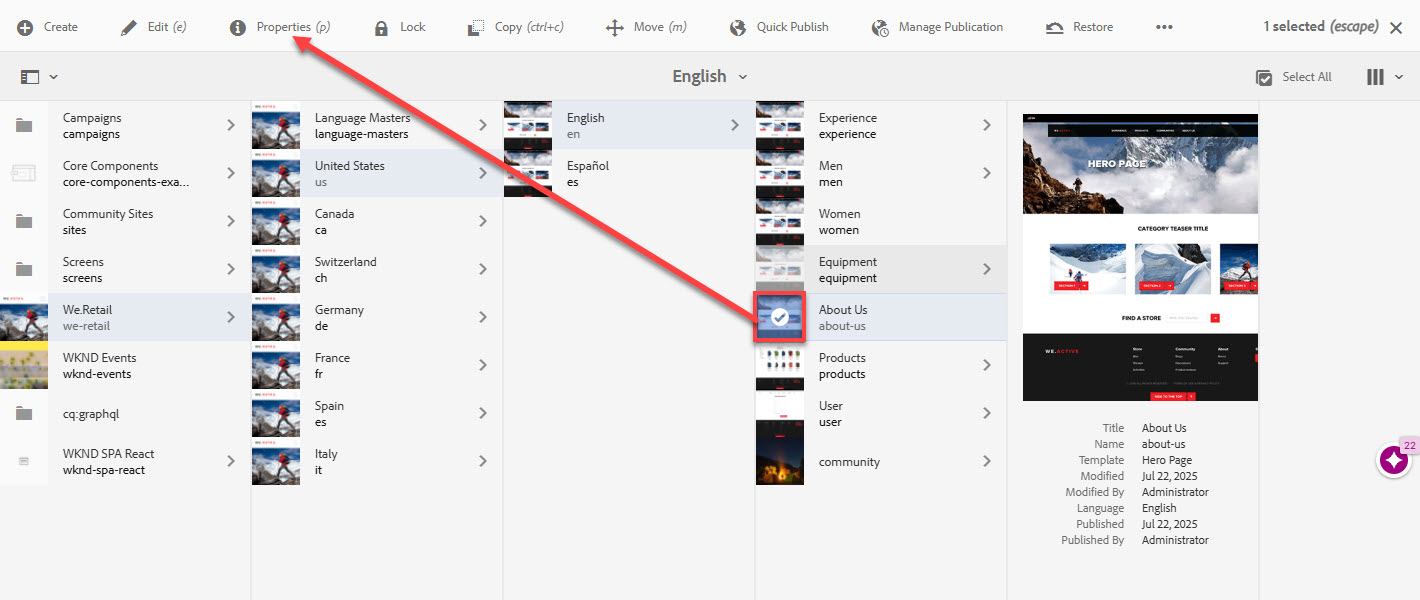
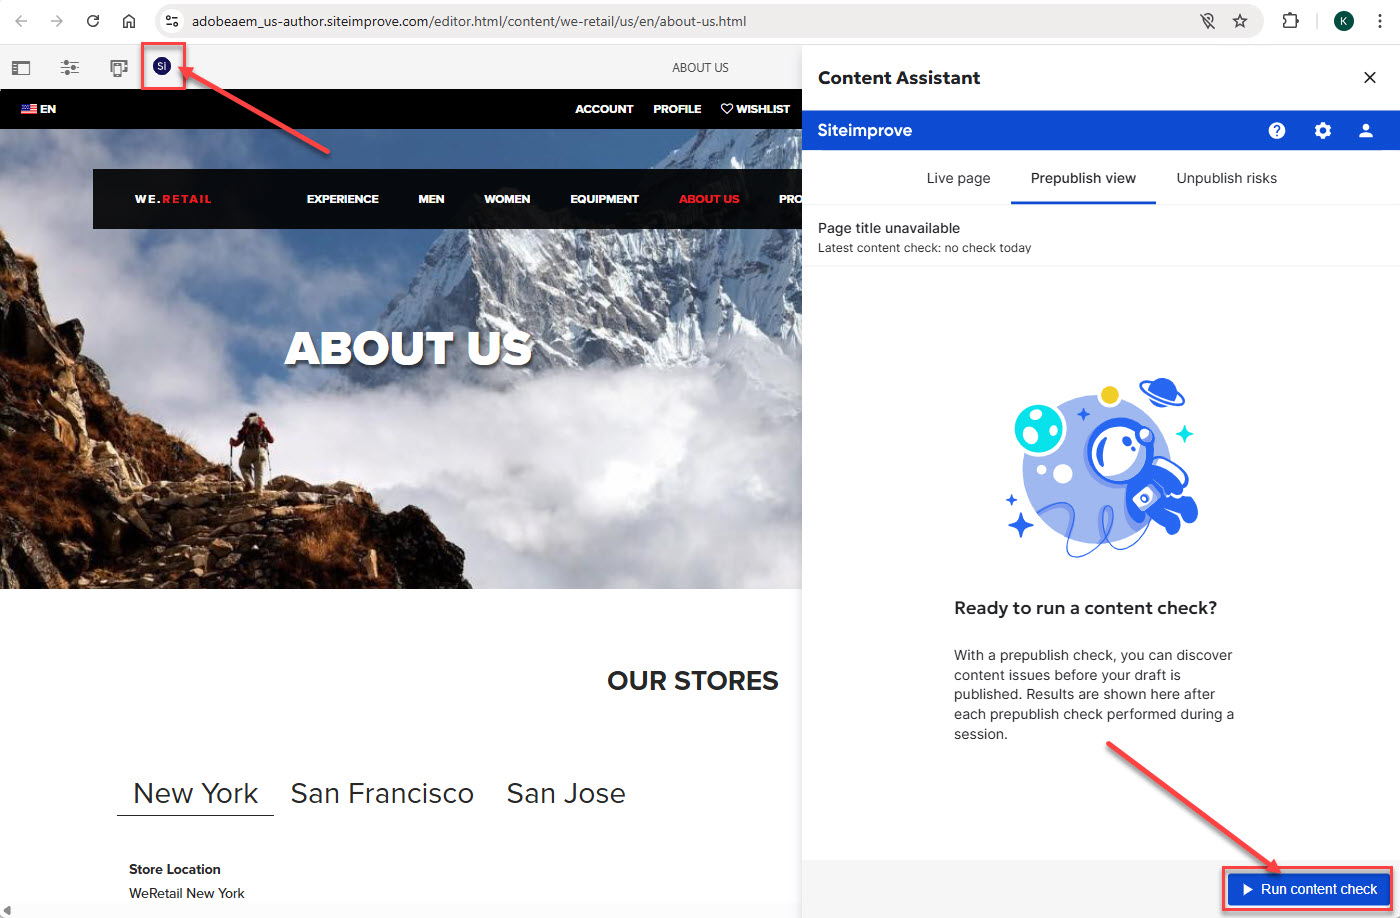
- In AEM under "Sites," select the page you want to check and click "Edit." Note: to run a Prepublish check the page needs to be saved as a draft. It doesn't have to be published, but you can perform a Prepublish check of a published page as well.
- Click the "Run content check" button under the "Prepublish view" tab in the plugin overlay window, or for older versions, select the Siteimprove icon in the page editor toolbar (the SI icon in the upper left-hand corner of the page) to start a Prepublish check. Note: It is expected behavior for the "Live page" view to display "No Results Yet" and the plugin to display "Page not found" if the page hasn't been published yet, as the "Live Page" tab shows results for content that has been published and scanned in the Siteimprove Platform.
- The checks may take some time to process, and a loading bar should appear to show the progress. You have the option to select the "Cancel content check" button to cancel the current check.

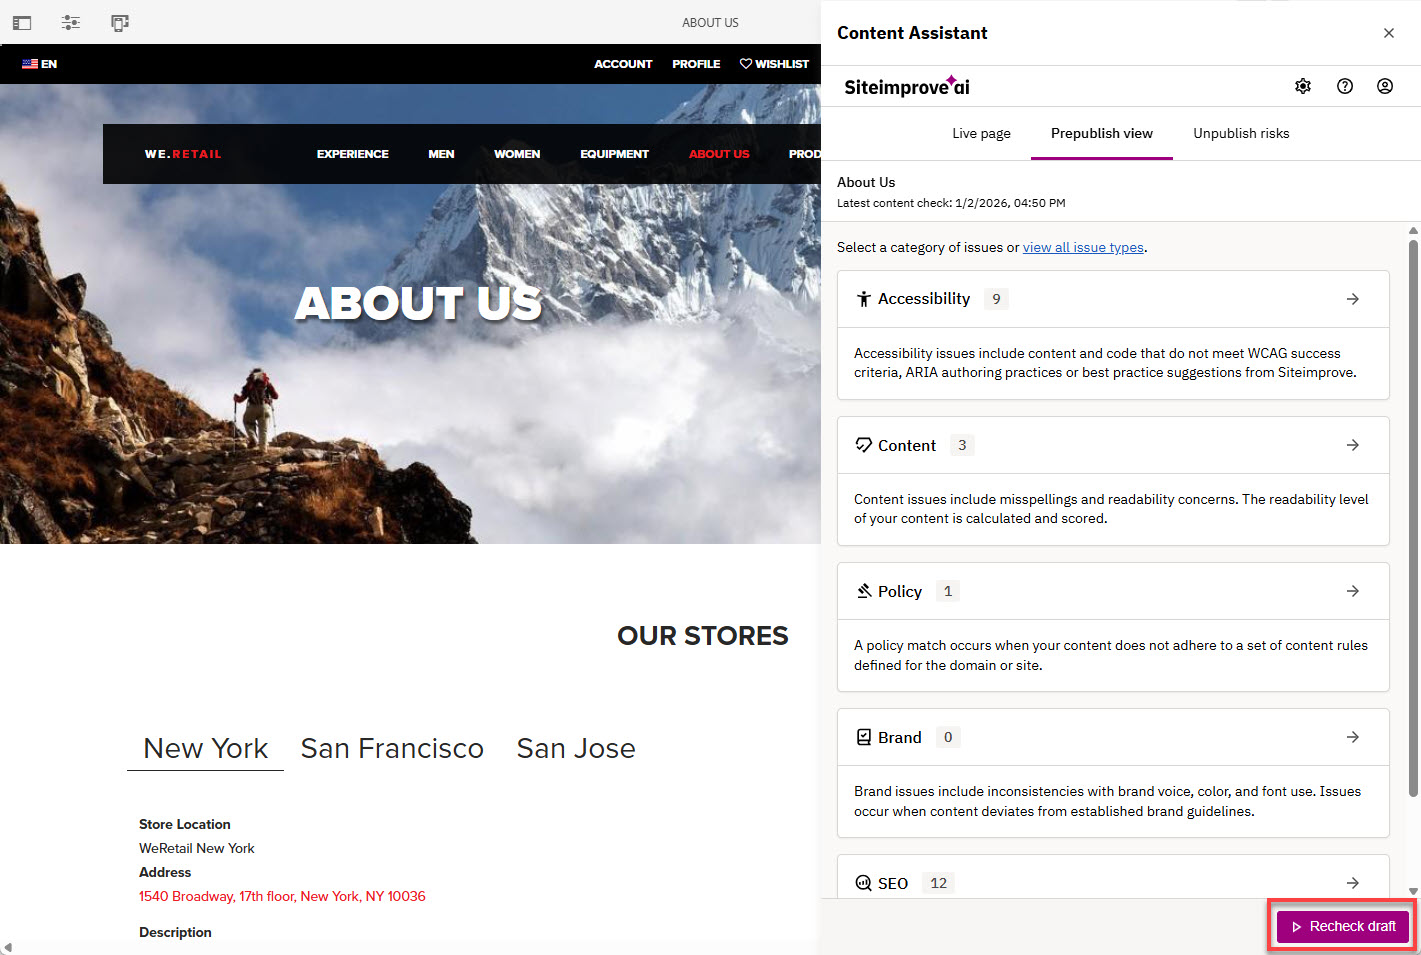
- Once the checks have completed processing, you can see the results of the checks. See Overall Prepublish Check Usage for more on general Prepublish check usage.
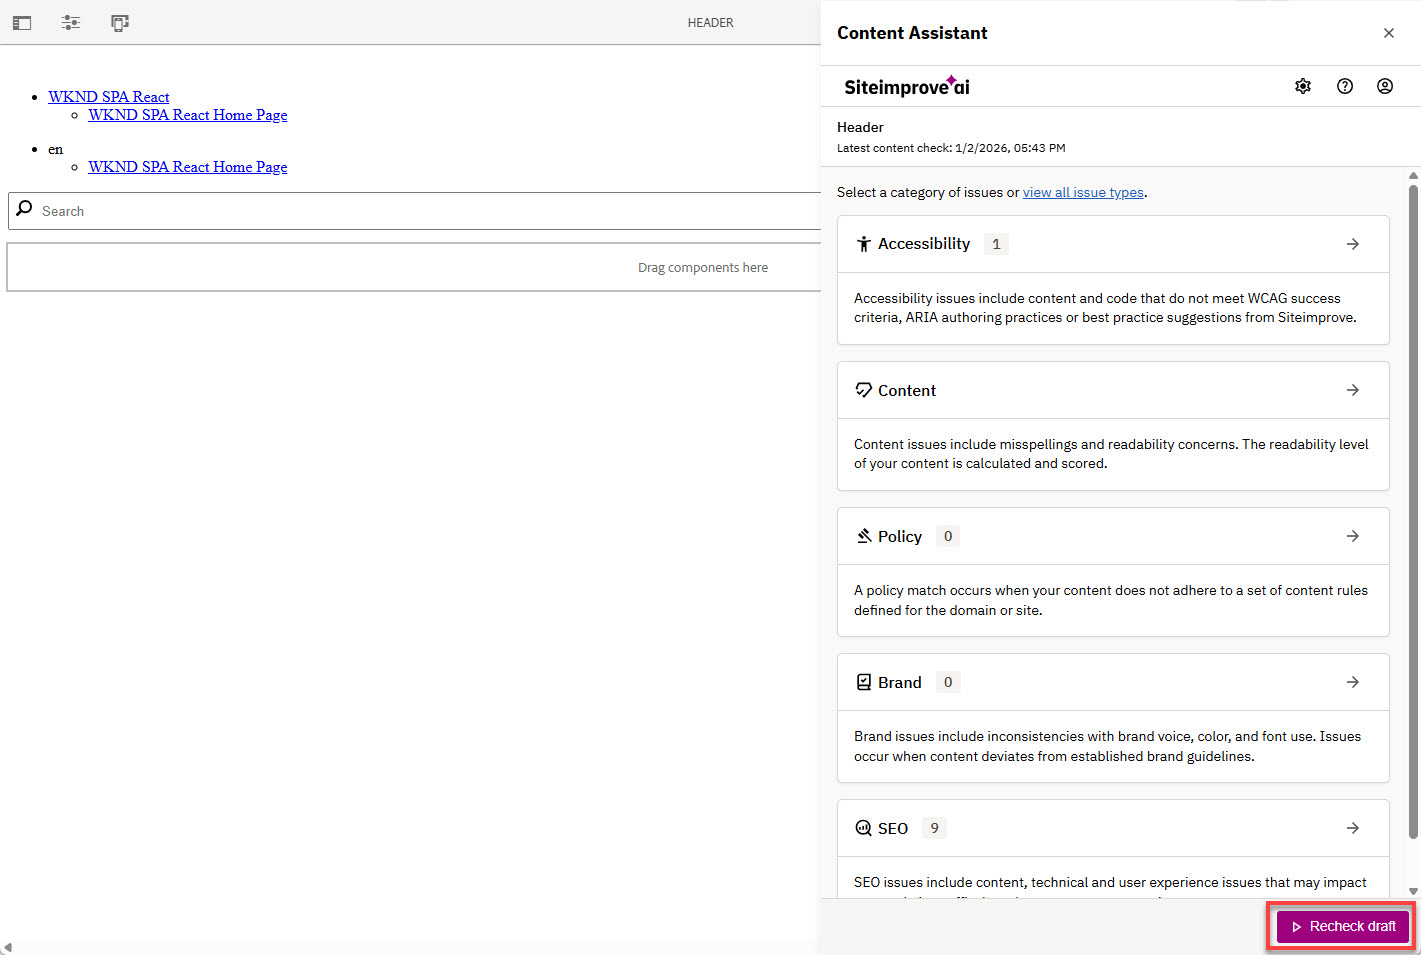
- Rerunning a Prepublish check - If you want to rerun a check, with newer versions of the plugin, you should be able to select the "Recheck draft" button. For older versions of this plugin, you may only be able to run one Prepublish check once per page load. If you have already run a check, you may need to refresh the page to start a new Prepublish check.
- Rerunning a Prepublish check - If you want to rerun a check, with newer versions of the plugin, you should be able to select the "Recheck draft" button. For older versions of this plugin, you may only be able to run one Prepublish check once per page load. If you have already run a check, you may need to refresh the page to start a new Prepublish check.
Adobe Experience Fragments
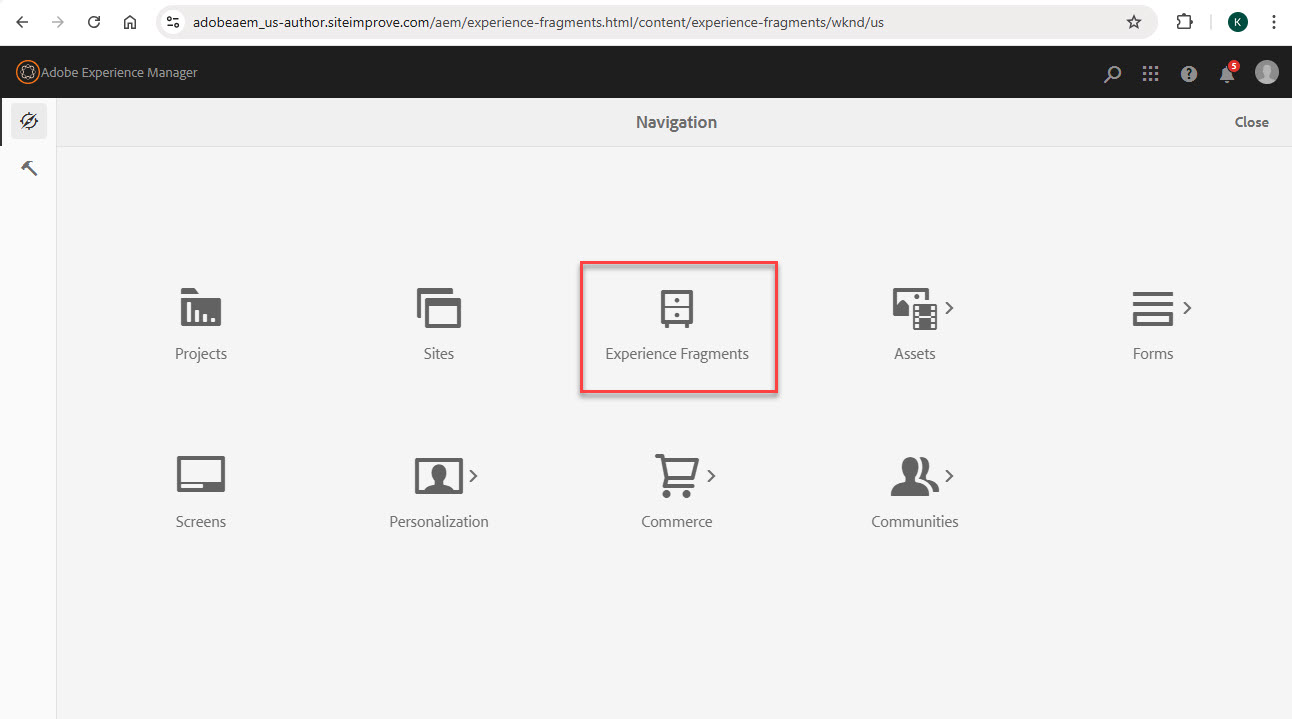
- Under the main navigation menu in AEM, select "Experience Fragments."
- In the AEM Experience Fragments console, select the fragment you’d like to check and click "Edit."
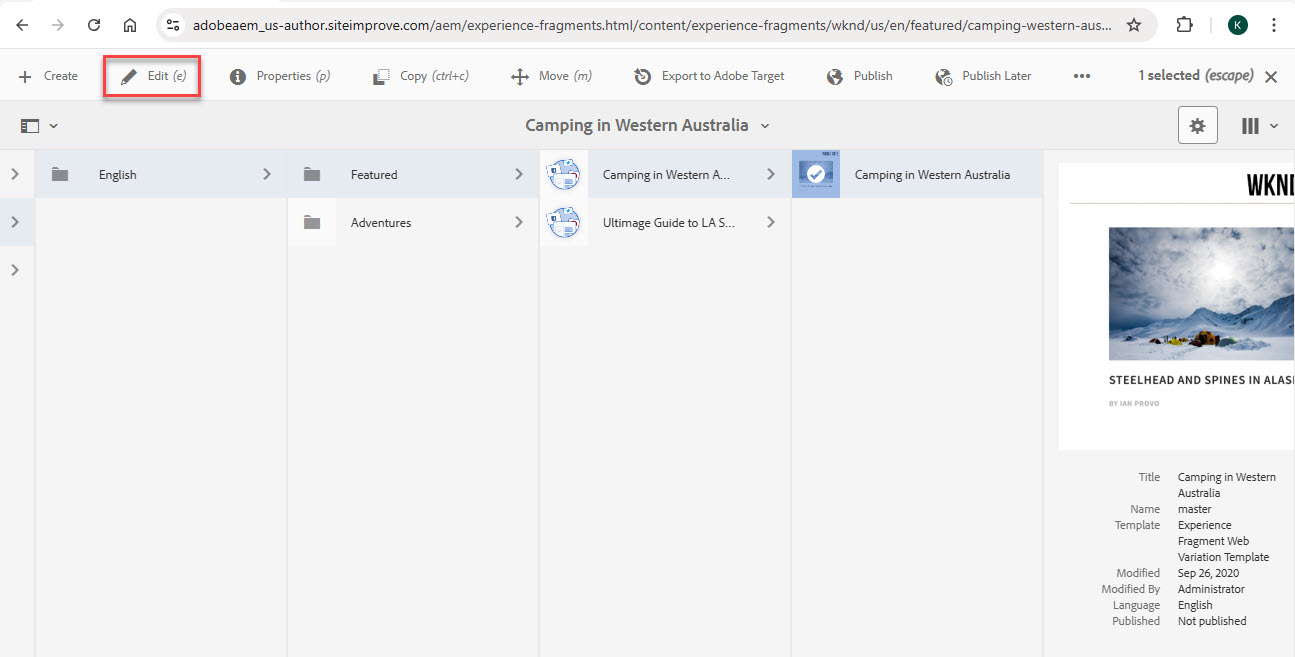
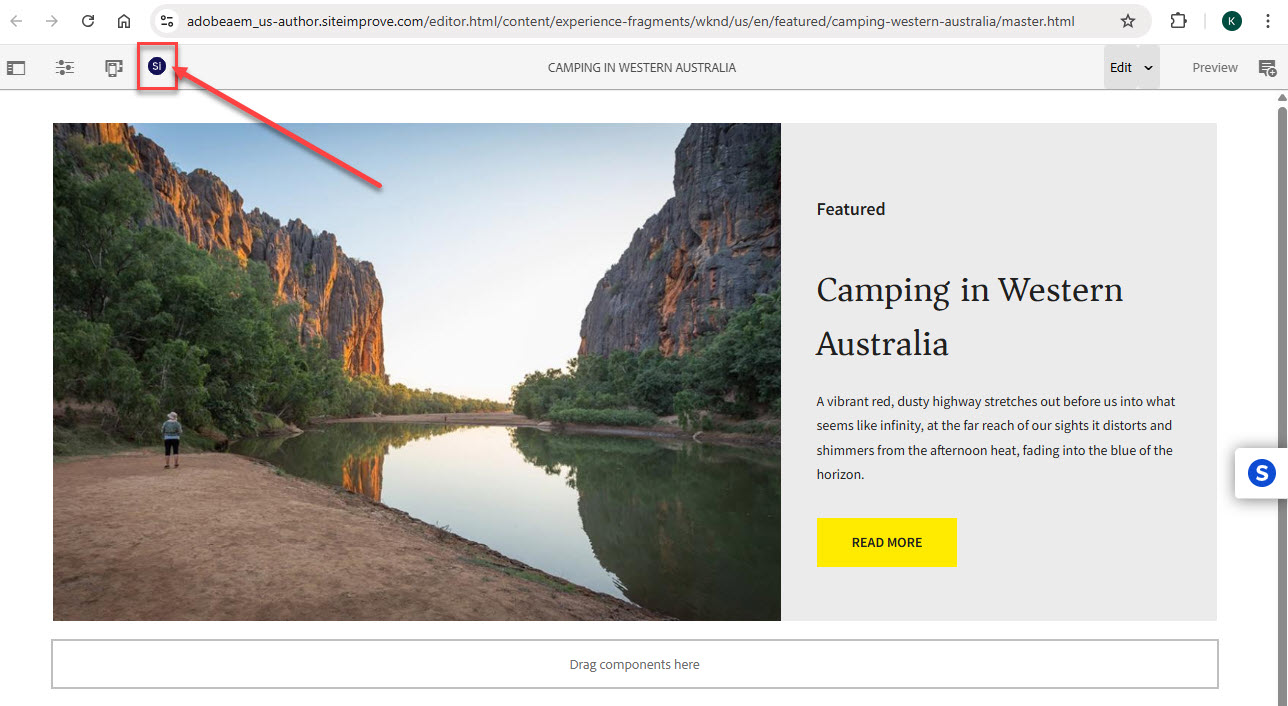
- Click the "Run content check" button under in the plugin overlay window, or for older versions, select the Siteimprove icon in the page editor toolbar (the SI icon in the upper left-hand corner of the page) to start a Prepublish (Content) check.
- The checks may take some time to process, and a loading bar should appear to show the progress. You have the option to select the "Cancel content check" button to cancel the current check.

- Once the checks have completed processing, you can see the results of the checks. See Overall Prepublish Check Usage for more on general Prepublish check usage.
- Rerunning a Prepublish check - Select the "Recheck draft" button in the plugin overlay, or for older versions of the plugin that don't have this option, you will need to refresh the page to start a new Prepublish check, as only one check can be run per page load. See Overall Prepublish Check Usage for more on general Prepublish check usage.
- Rerunning a Prepublish check - Select the "Recheck draft" button in the plugin overlay, or for older versions of the plugin that don't have this option, you will need to refresh the page to start a new Prepublish check, as only one check can be run per page load. See Overall Prepublish Check Usage for more on general Prepublish check usage.
Optimizely
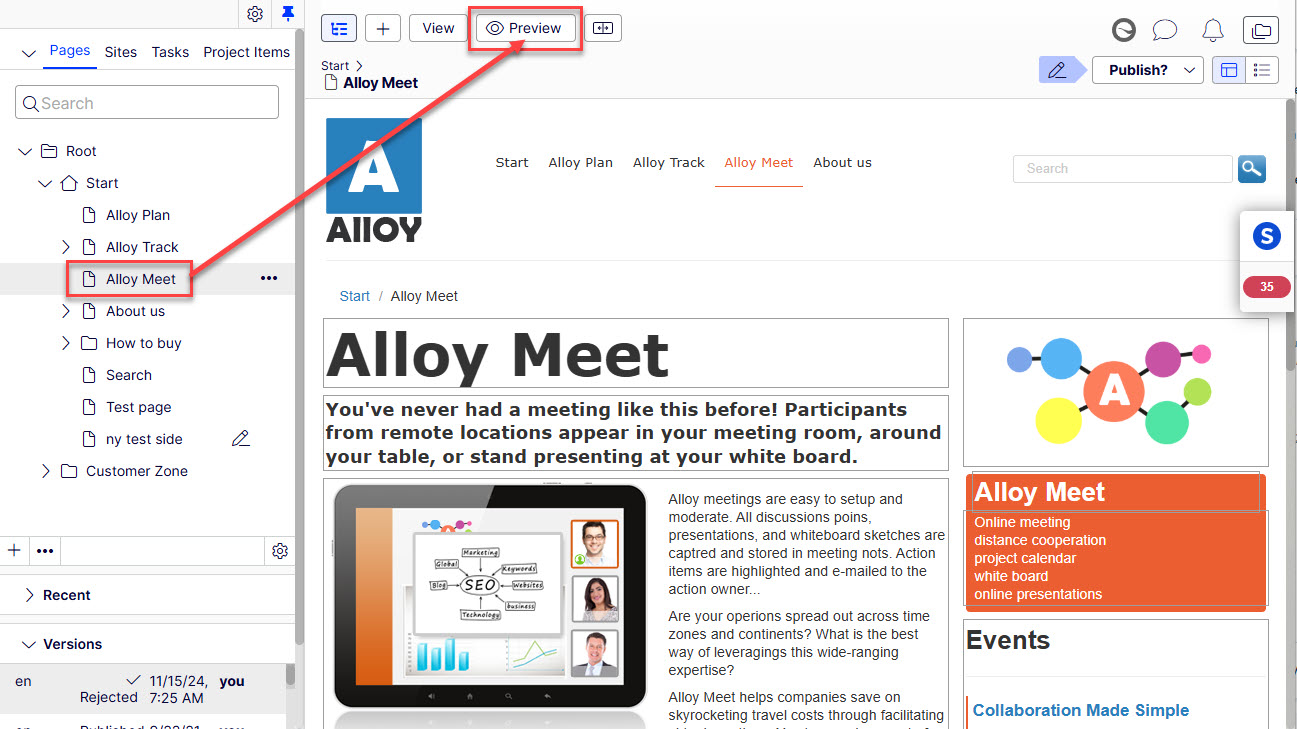
- Select the page you want to check, and make sure to select the "Preview" button to preview the content of the page. You need to be in "Preview" mode for the checks and highlighting to work properly. Note: To run a Prepublish check, the page needs to be saved as a draft. It doesn't have to be published, but you can do a Prepublish check of a published page as well.
- There are two different ways to perform a Prepublish (Content) check listed below. Note:It is expected behavior for the "Live page" view to display "No Results Yet" if the page hasn't been published yet, as the "Live Page" tab shows results for content that has been published and scanned in the Siteimprove Platform.
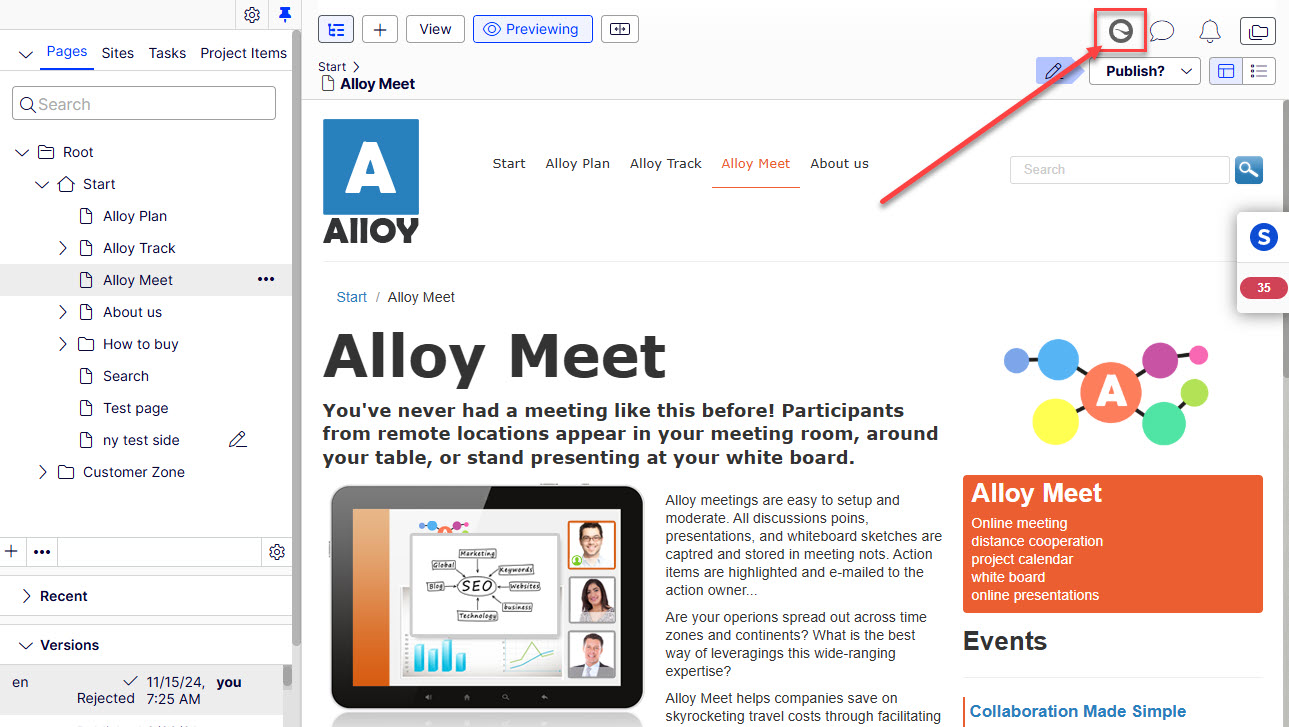
- Click the Siteimprove icon in the page editor toolbar (the SI icon in the upper right-hand corner of the page) to start a Prepublish check.
- Select the "Run content check" button under the "Prepublish view" in the plugin overlay when expanded out.
- Click the Siteimprove icon in the page editor toolbar (the SI icon in the upper right-hand corner of the page) to start a Prepublish check.
- The checks may take some time to process, and a loading bar should appear to show the progress. You have the option to select the "Cancel content check" button to cancel the current check.
- Once the checks have completed processing, you can see the results of the checks. See Overall Prepublish Check Usage for more on general Prepublish check usage.
- Rerunning a Prepublish check - If you want to rerun a check, with newer versions of the plugin you should be able to select the "Recheck draft" button. For older versions of this plugin, you may only be able to run one Prepublish check once per page load. If you have already run a check, you may need to refresh the page to start a new Prepublish check.
- Rerunning a Prepublish check - If you want to rerun a check, with newer versions of the plugin you should be able to select the "Recheck draft" button. For older versions of this plugin, you may only be able to run one Prepublish check once per page load. If you have already run a check, you may need to refresh the page to start a new Prepublish check.
Wordpress
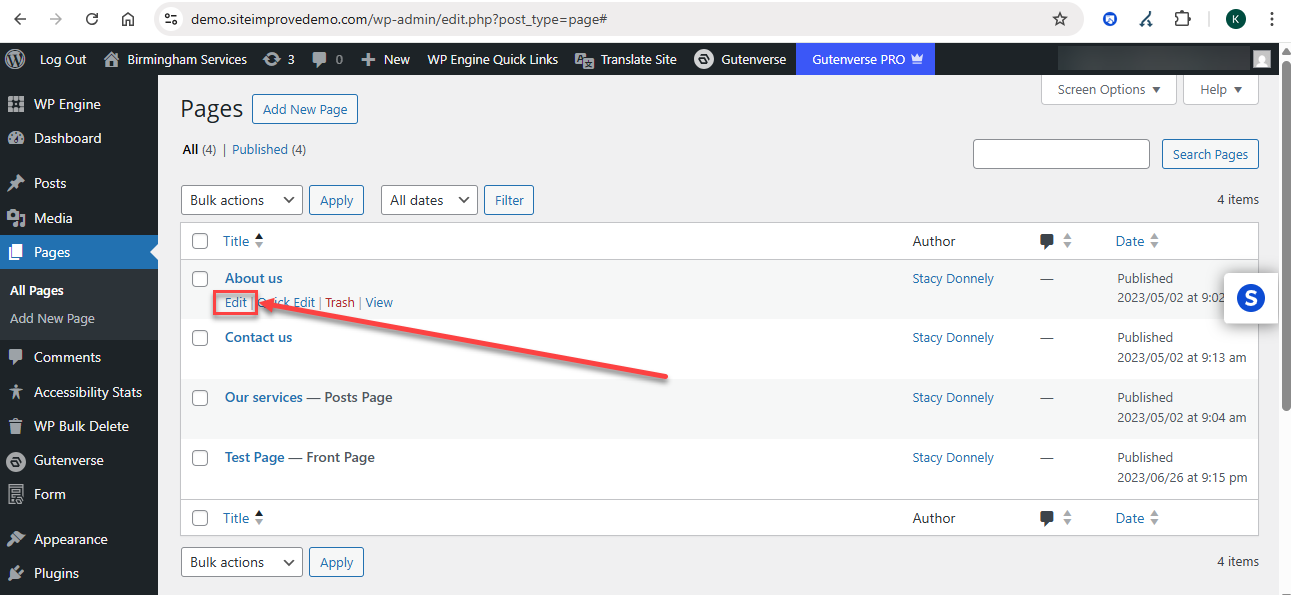
- In the WordPress admin console, select the page you’d like to check and select "Edit." Note: To run a Prepublish check the page needs to be saved as a draft. It doesn't have to be published, but you can do a Prepublish check of a published page as well.
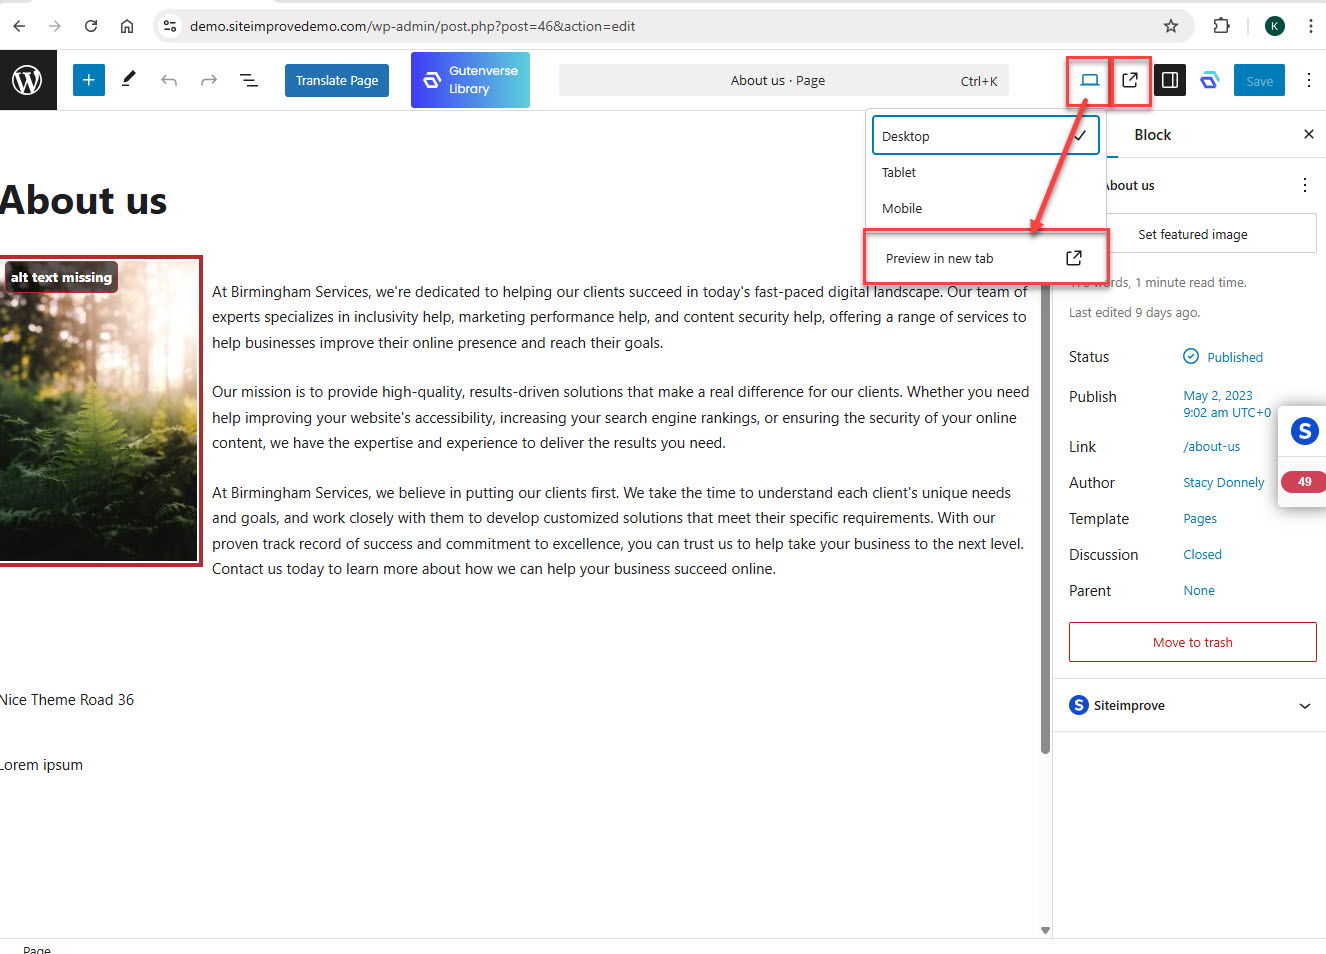
- Click the 'Preview' button in the editor to be redirected to a preview screen showing the page with current unsaved changes. The Preview button location can vary depending on the version of the editor used. Note: You will only see highlighted items in Preview mode.
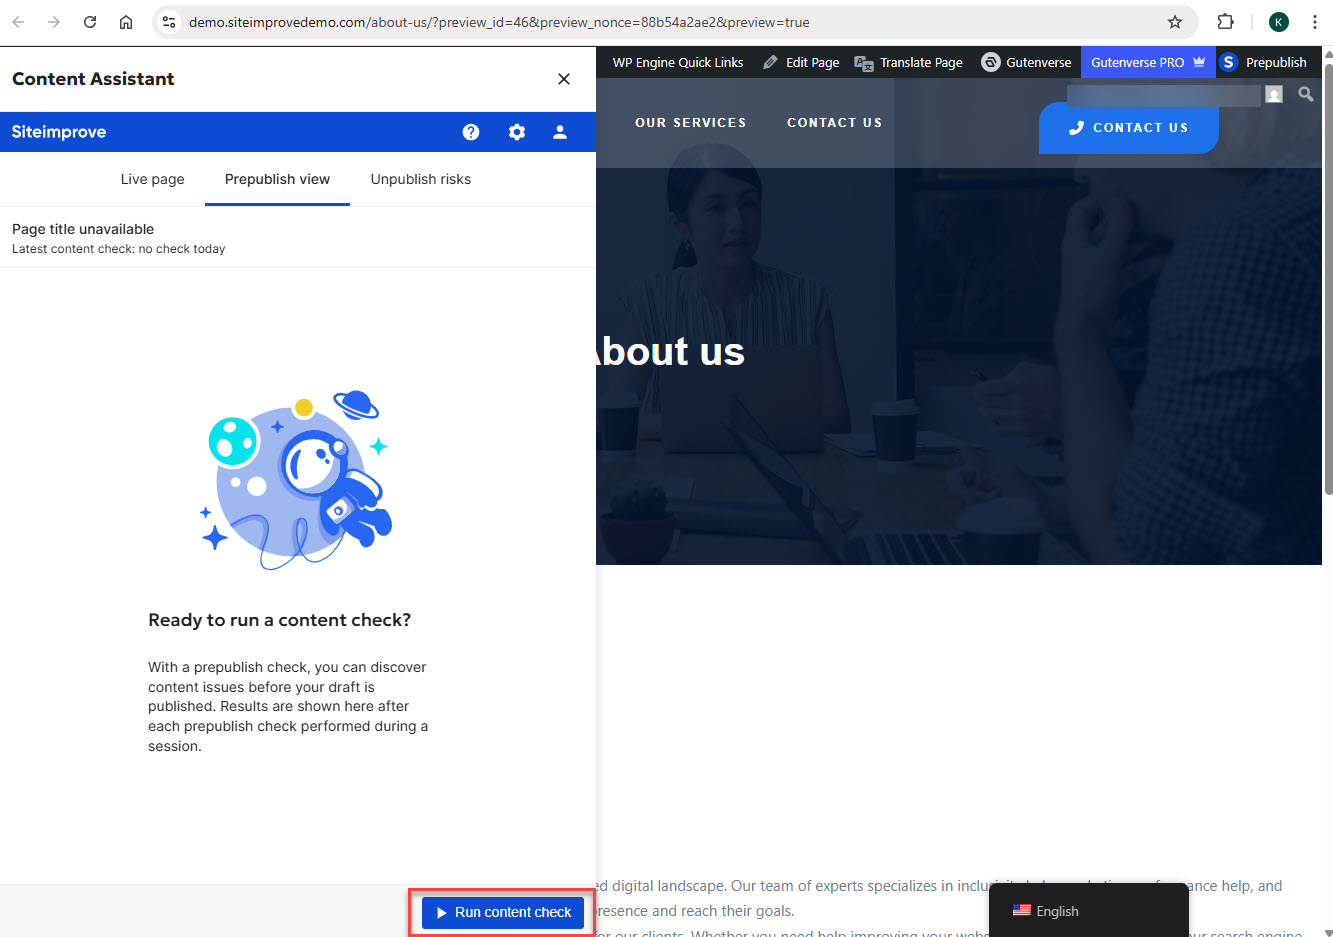
- Choose one of the two options below to start a Prepublish Check. Note: It is expected behavior for the "Live page" view to display "No Results Yet" if the page hasn't been published yet, as the "Live Page" tab shows results for content that has been published and scanned in the Siteimprove Platform.
- Select the Prepublish button in the top bar.

- Select the plugin overlay to expand it out, select the "Prepublish view" tab, and click the "Run prepublish check" button.
- Select the Prepublish button in the top bar.
- The checks may take some time to process, and a loading bar should appear to show the progress. You have the option to select the "Cancel content check" button to cancel the current check.
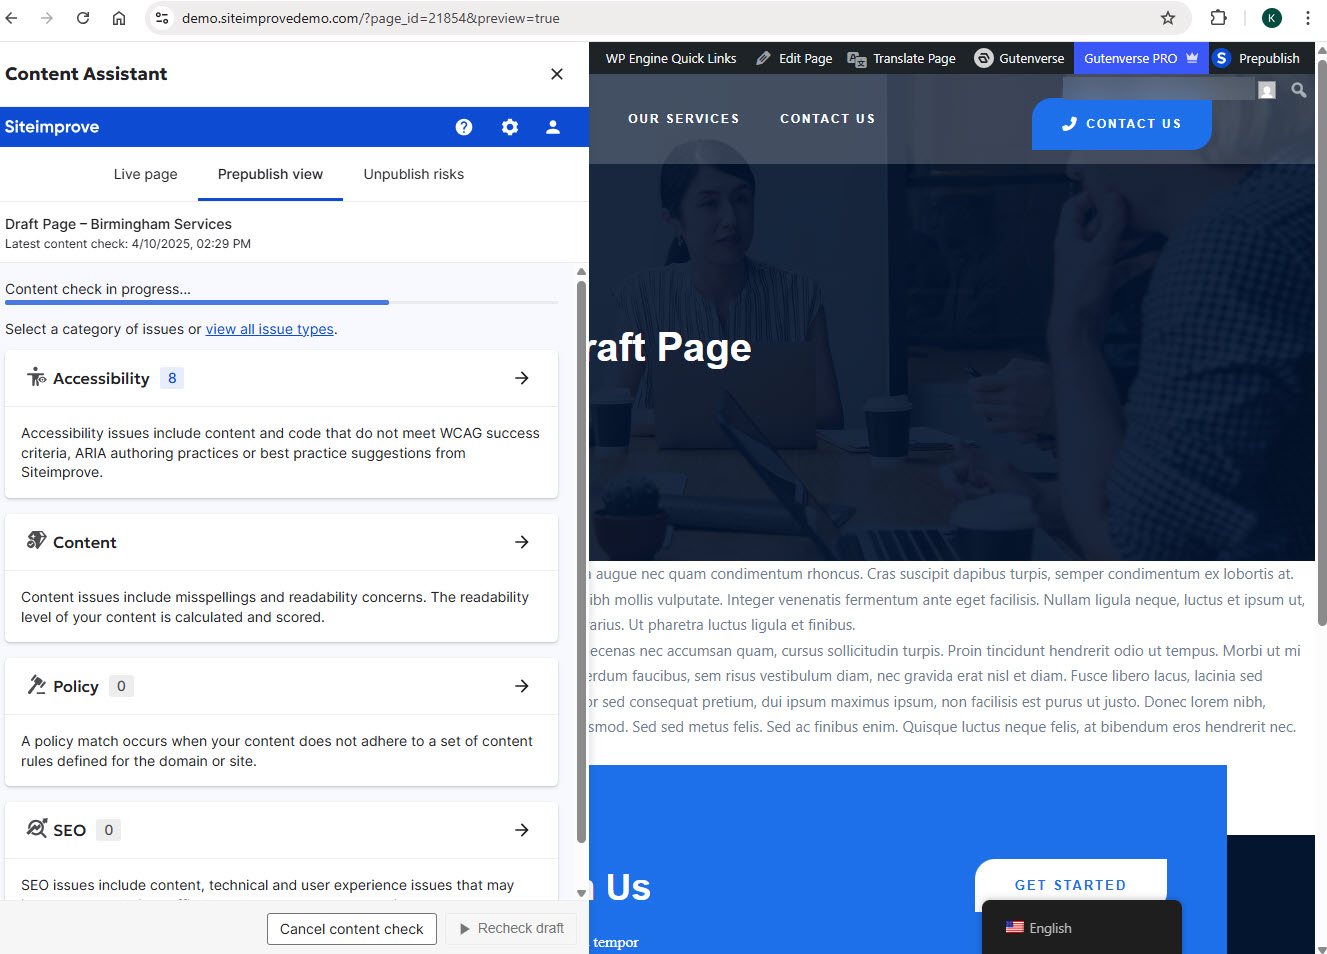
- Once the checks have completed processing, you can see the results of the checks. See Overall Prepublish Check Usage for more on general Prepublish check usage.
- Rerunning a Prepublish check - If you want to rerun a check, with newer versions of the plugin you should be able to select the "Recheck draft" button. For older versions of this plugin, you may only be able to run one Prepublish check once per page load. If you have already run a check, you may need to refresh the page to start a new Prepublish check.
- Rerunning a Prepublish check - If you want to rerun a check, with newer versions of the plugin you should be able to select the "Recheck draft" button. For older versions of this plugin, you may only be able to run one Prepublish check once per page load. If you have already run a check, you may need to refresh the page to start a new Prepublish check.
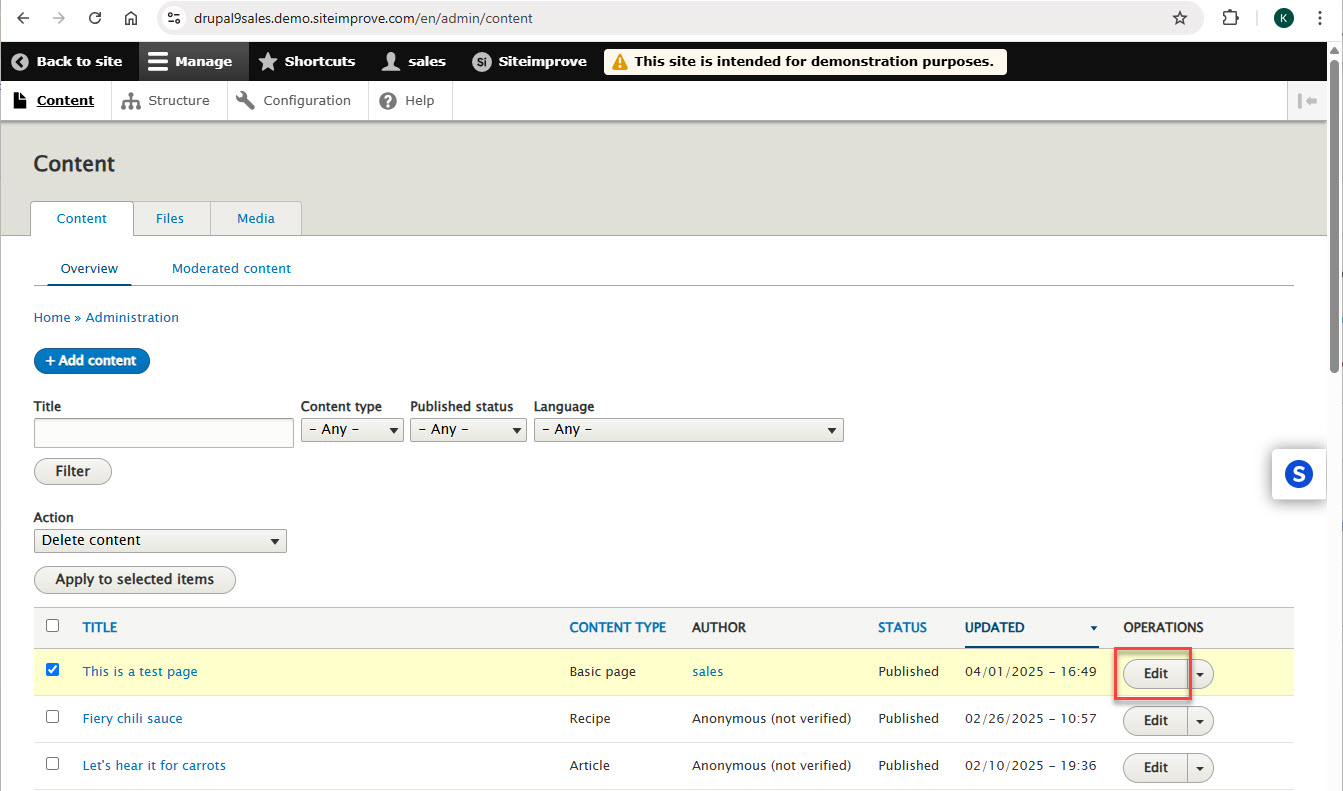
Drupal
- In Drupal, select the page you’d like to check and click "Edit. Note: To run a Prepublish check the page needs to be saved as a draft. It doesn't have to be published, but you can do a Prepublish check of a published page as well.
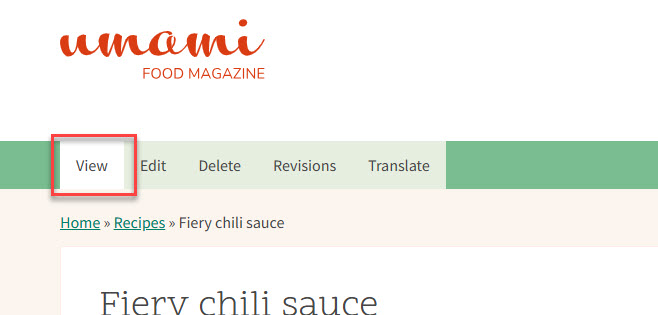
- Select the "View" tab for the options to run Prepublish checks to appear. Options to get to the "View" mode may be different for other Drupal Themes. Note: You can only do Prepublish checks in "View" (Preview) mode and not in "Edit" mode.
- Choose one of the two options below to start a Prepublish Check. Note: It is expected behavior for the "Live page" view to display "No Results Yet" if the page hasn't been published yet, as the "Live Page" tab shows results for content that has been published and scanned in the Siteimprove Platform.
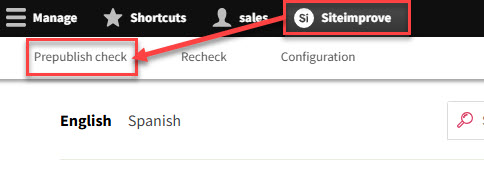
- Select the Siteimprove option in the top menu bar and then select the "Prepublish check" button under it next to "Recheck" and "Configuration."
- Select the plugin overlay to expand it out, select the "Prepublish view" tab, and click the "Run prepublish check" button.

- Select the Siteimprove option in the top menu bar and then select the "Prepublish check" button under it next to "Recheck" and "Configuration."
- A Prepublish check will run under the 'Prepublish view' tab in the CMS Plugin overlay and display results. You have the option to select the "Cancel content check" button to cancel the current check.
- Once the checks have completed processing, you can see the results of the checks. See Overall Prepublish Check Usage for more on general Prepublish check usage.
- Rerunning a Prepublish check - If you want to rerun a check, with newer versions of the plugin you should be able to select the "Recheck draft" button in the plugin overlay window. For older versions of this plugin, you may only be able to run one Prepublish check once per page load. If you have already run a check, you may need to refresh the page to start a new Prepublish check. Note: The "Recheck" option under the Siteimprove menu in the top bar does not rerun a Prepublish check. It rechecks the published page in the Siteimprove platform for content that has been published and scanned in the Siteimprove Platform.
- Rerunning a Prepublish check - If you want to rerun a check, with newer versions of the plugin you should be able to select the "Recheck draft" button in the plugin overlay window. For older versions of this plugin, you may only be able to run one Prepublish check once per page load. If you have already run a check, you may need to refresh the page to start a new Prepublish check. Note: The "Recheck" option under the Siteimprove menu in the top bar does not rerun a Prepublish check. It rechecks the published page in the Siteimprove platform for content that has been published and scanned in the Siteimprove Platform.
Sitecore
In Sitecore, you should be able to do Prepublish checks in the Content Editor and Experience Editors. Steps to run Prepublish checks with each editor are listed below. Pages Editor with Sitecore XM Cloud is not yet supported.
Sitecore Content Editor
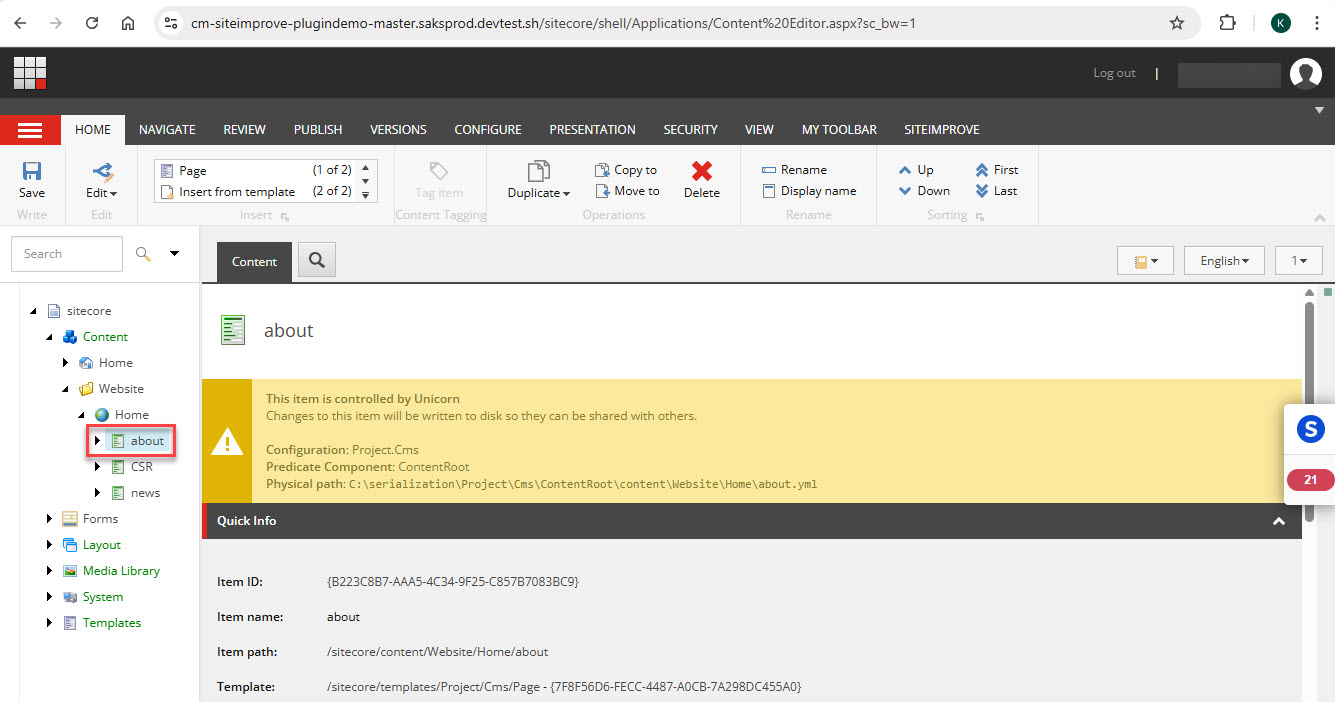
- Select the page you’d like to check from the Content Tree. Make sure you are in editing mode. Note: To run a Prepublish check, the page needs to be saved as a draft. It doesn't have to be published, but you can do a Prepublish check of a published page as well.
- Choose one of the two options below to start a Prepublish Check. Note: It is expected behavior for the "Live page" view to display "No Results Yet" if the page hasn't been published yet, as the "Live Page" tab shows results for content that has been published and scanned in the Siteimprove Platform.
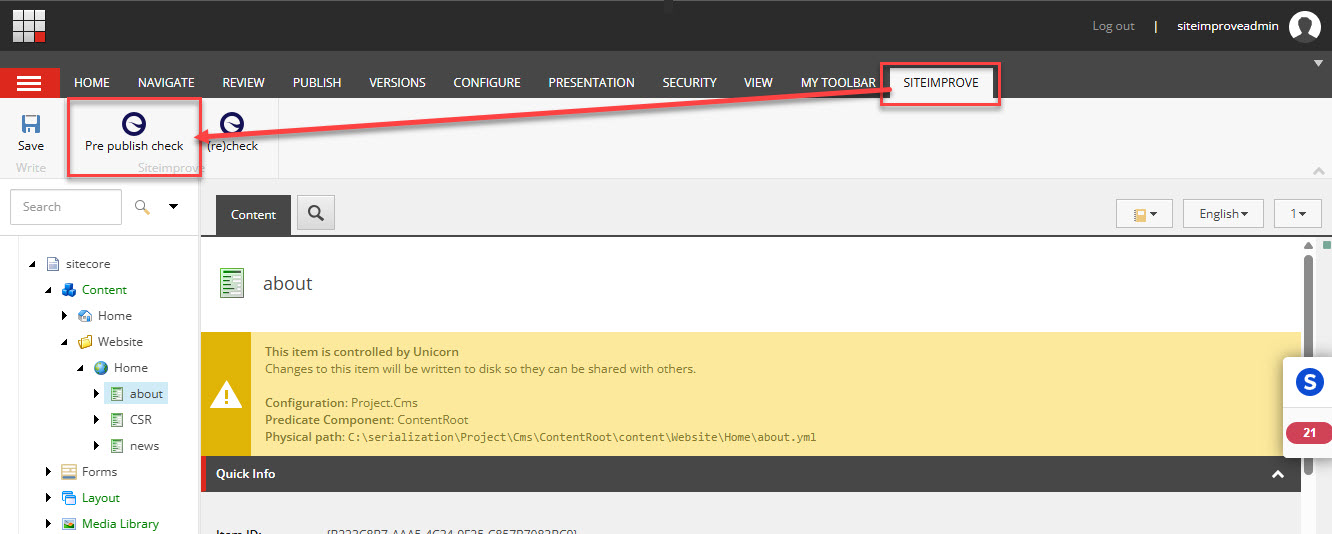
- Select the Siteimprove tab in the top menu bar and then select the "Pre publish check" button under it next to "Recheck." Note: The "Recheck" option rechecks the live published page in the Siteimprove platform.
- Select the plugin overlay to expand it out, select the "Prepublish view" tab, and click the "Run prepublish check" button.
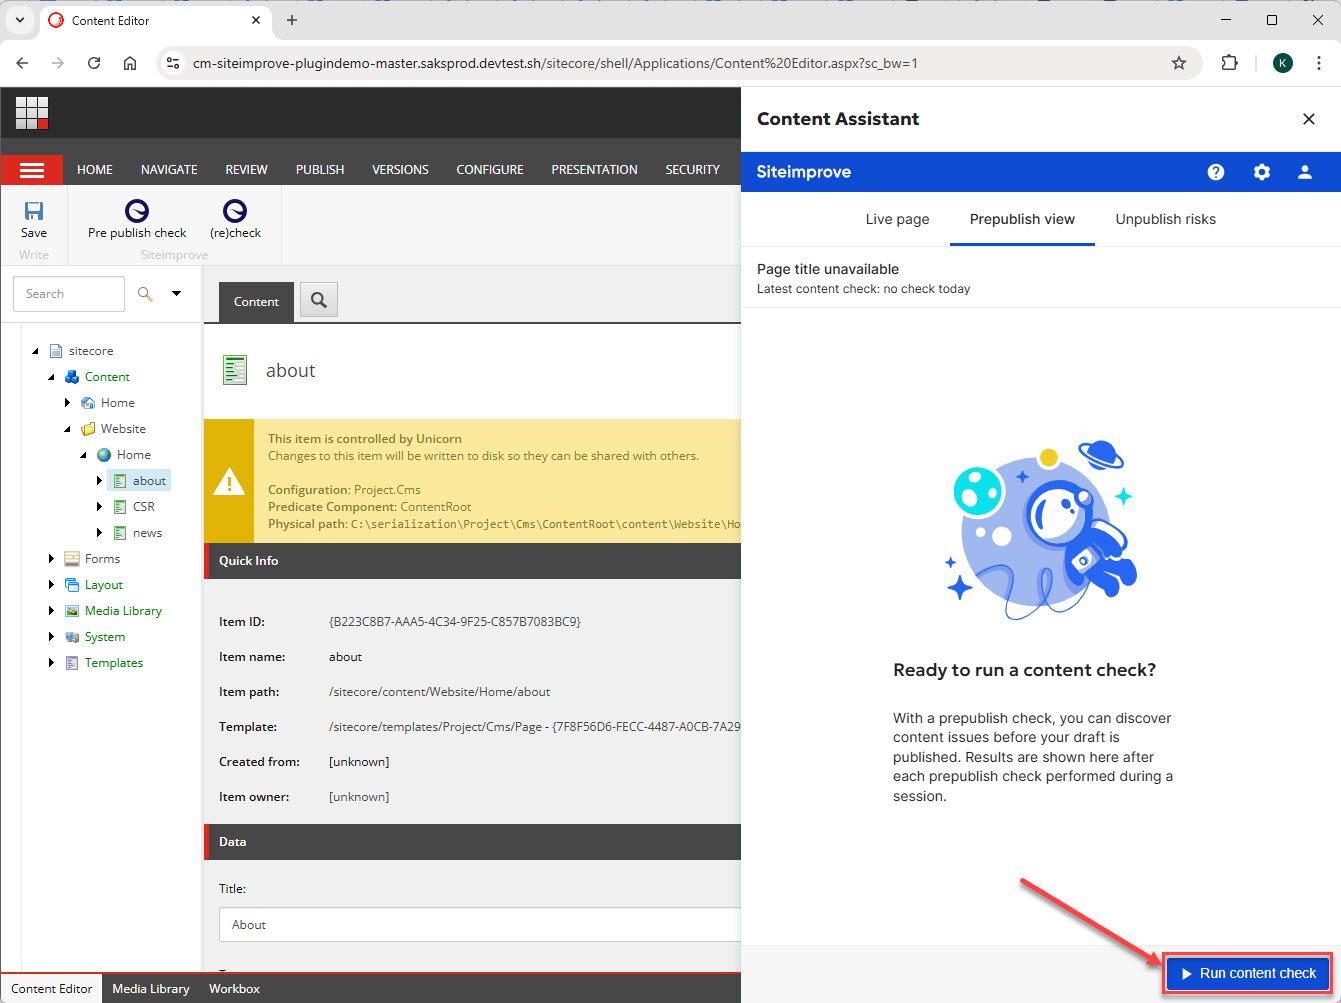
- Select the Siteimprove tab in the top menu bar and then select the "Pre publish check" button under it next to "Recheck." Note: The "Recheck" option rechecks the live published page in the Siteimprove platform.
- A Prepublish check will run under the "Prepublish view" tab in the CMS Plugin overlay and display results. A Preview window will also pop-up displaying a Preview of the content of the page. You have the option to select the "Cancel content check" button to cancel the current check.
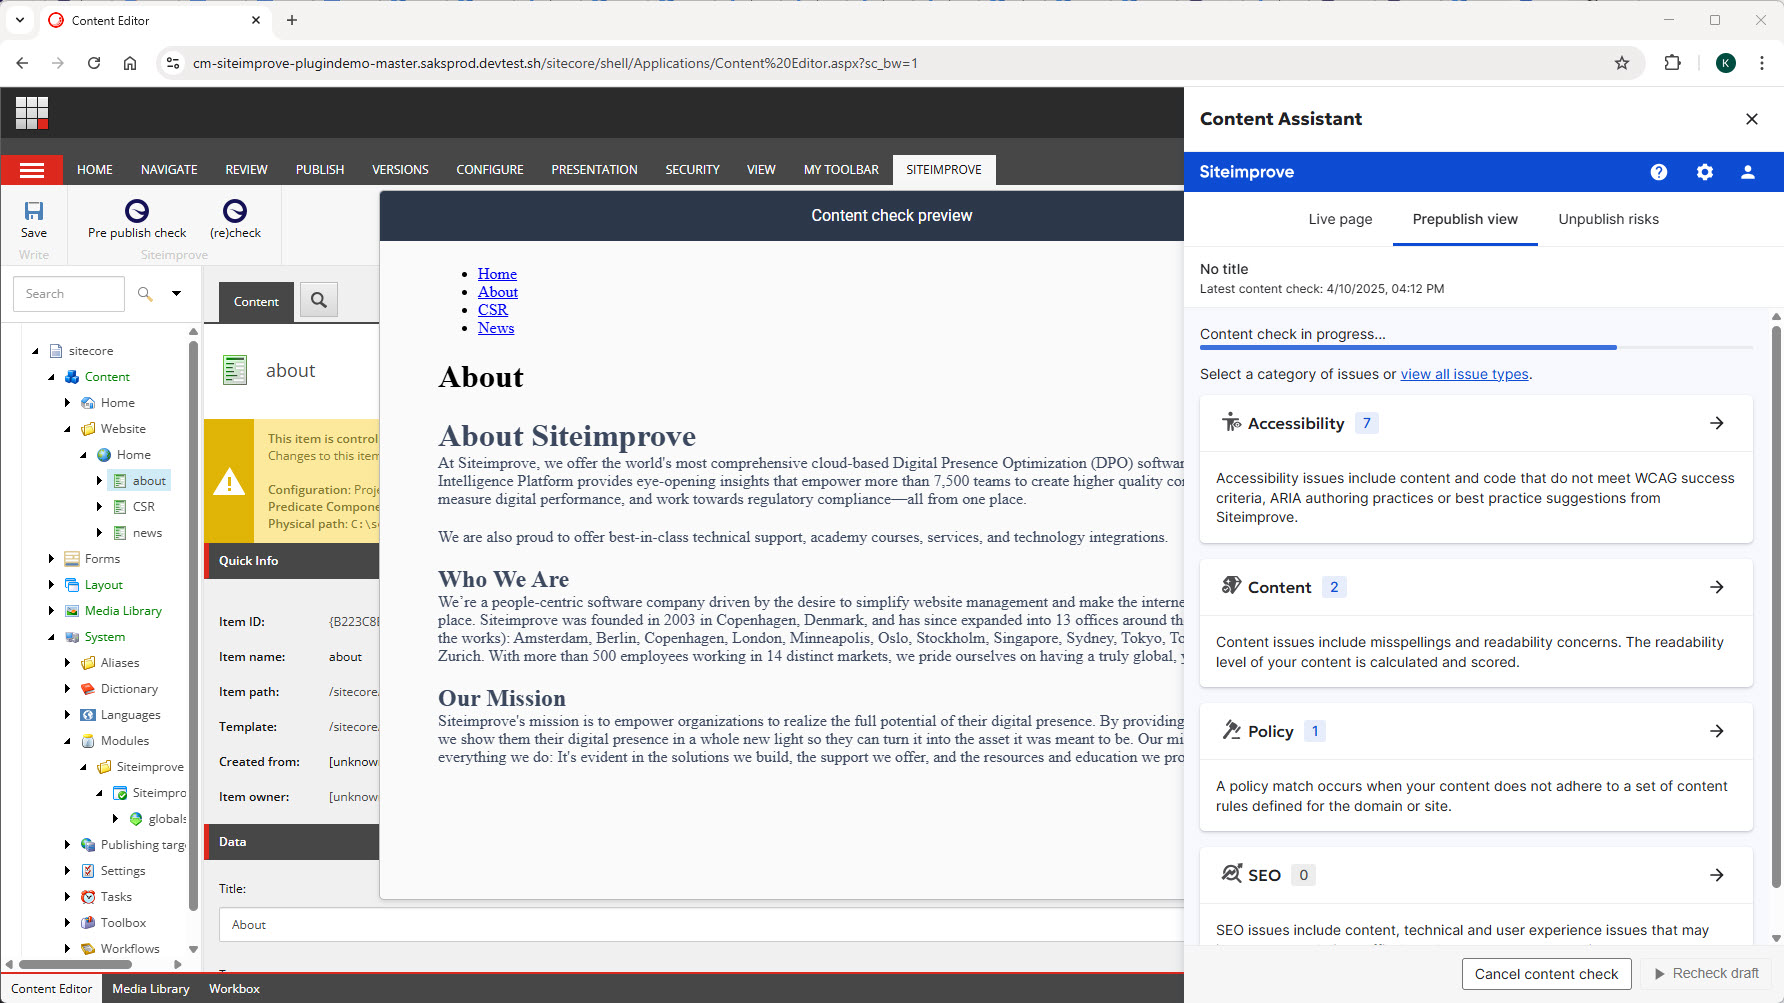
- Once the checks have completed processing, you can see the results of the checks. See Overall Prepublish Check Usage for more on general Prepublish check usage.
- Rerunning a Prepublish check - If you want to rerun a check, with newer versions of the plugin you should be able to select the "Recheck draft" button in the plugin overlay window. For older versions of this plugin, you may only be able to run one Prepublish check once per page load. If you have already run a check, you may need to refresh the page to start a new Prepublish check. Note: The "Recheck" option under the Siteimprove menu in the top bar does not rerun a Prepublish check. It rechecks the published page in the Siteimprove platform for content that has been published and scanned in the Siteimprove Platform.
- Rerunning a Prepublish check - If you want to rerun a check, with newer versions of the plugin you should be able to select the "Recheck draft" button in the plugin overlay window. For older versions of this plugin, you may only be able to run one Prepublish check once per page load. If you have already run a check, you may need to refresh the page to start a new Prepublish check. Note: The "Recheck" option under the Siteimprove menu in the top bar does not rerun a Prepublish check. It rechecks the published page in the Siteimprove platform for content that has been published and scanned in the Siteimprove Platform.
Sitecore Experience Editor
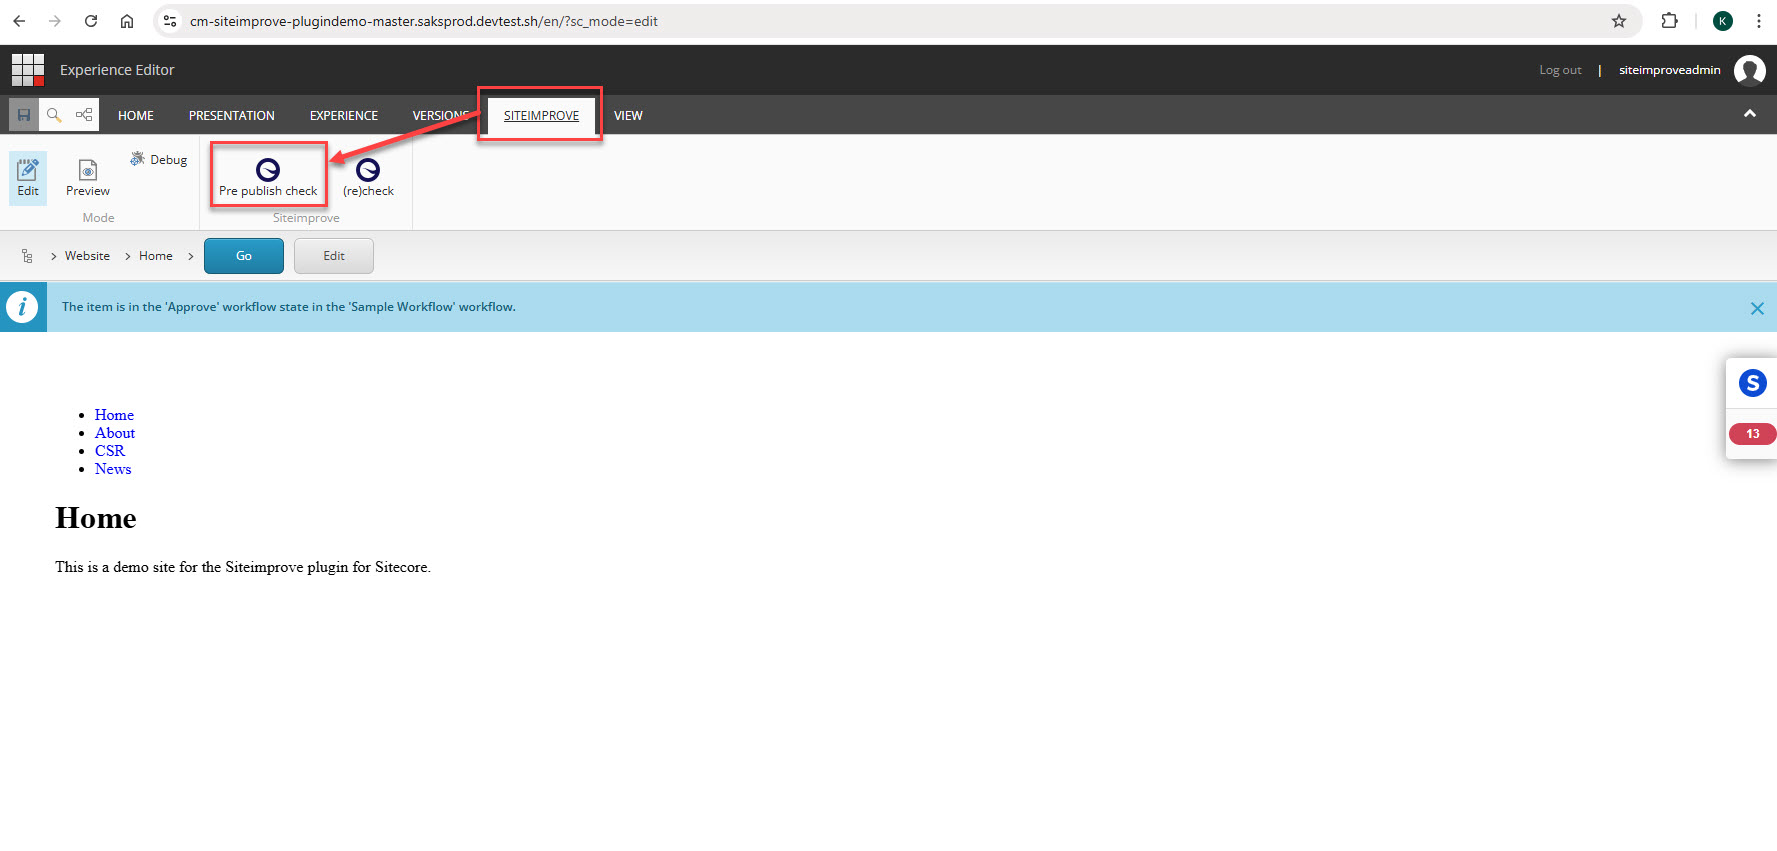
- Select the page you’d like to check. Note: To run a Prepublish check the page needs to be saved as a draft. It doesn't have to be published, but you can do a Prepublish check of a published page as well.
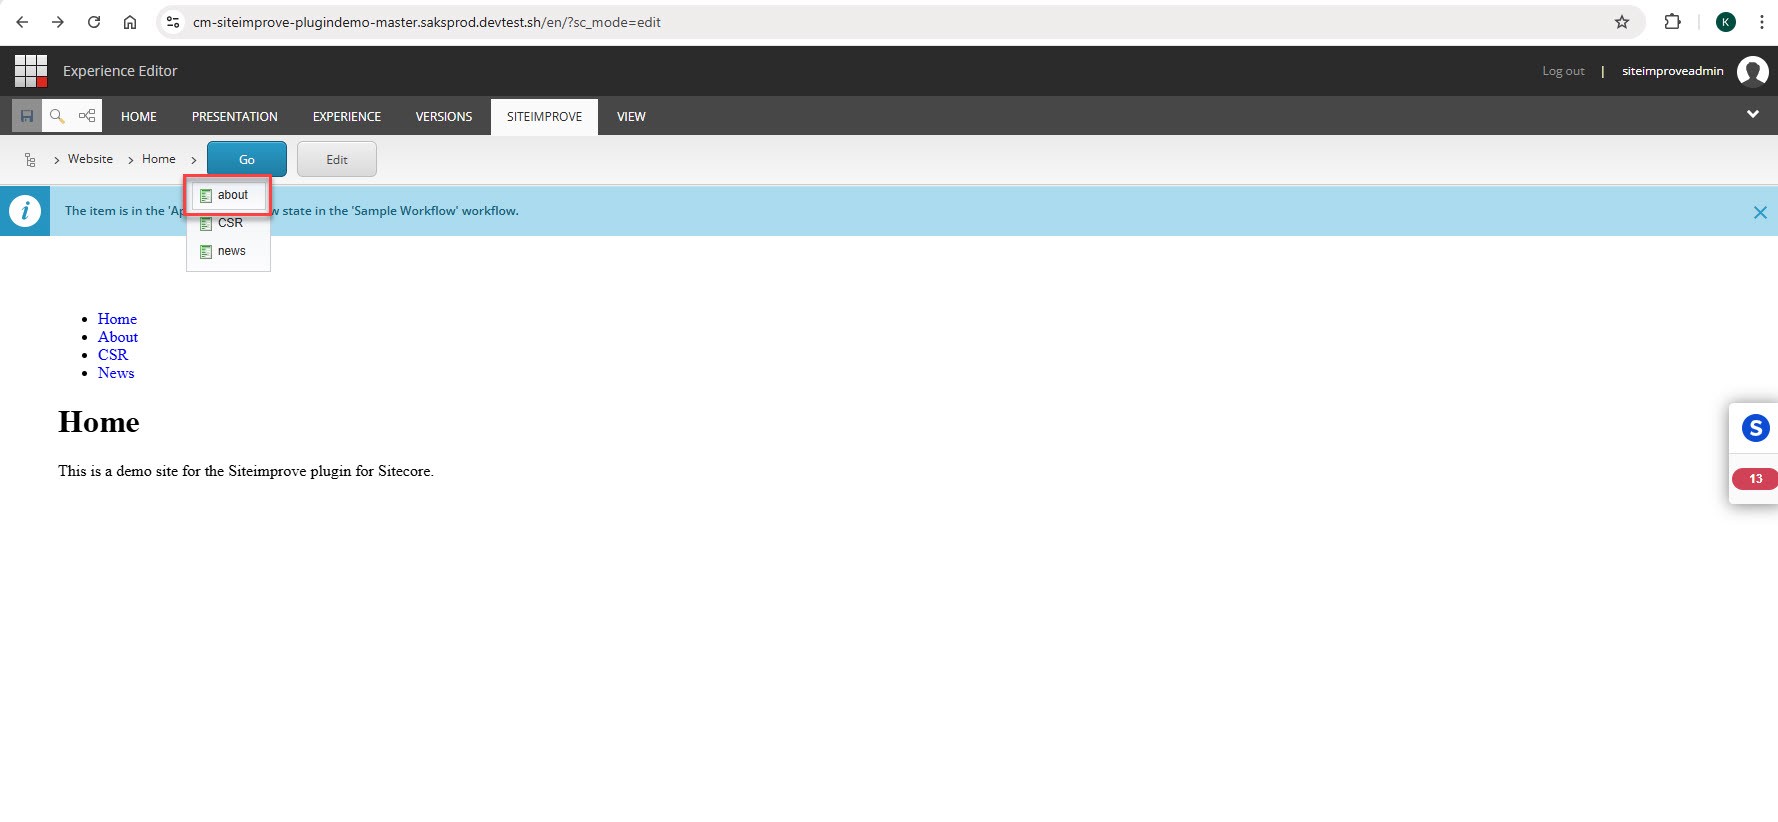
- Select the Siteimprove tab in the top menu bar and then select the "Pre publish check" button under it next to "Recheck." Note: The "Recheck" option rechecks the live published page in the Siteimprove platform. Also, it is expected behavior for the "Live page" view to display "No Results Yet" if the page hasn't been published yet, as the "Live Page" tab shows results for content that has been published and scanned in the Siteimprove Platform.
- A Prepublish check will run under the "Prepublish view" tab in the CMS Plugin overlay and display results. You have the option to select the "Cancel content check" button to cancel the current check.
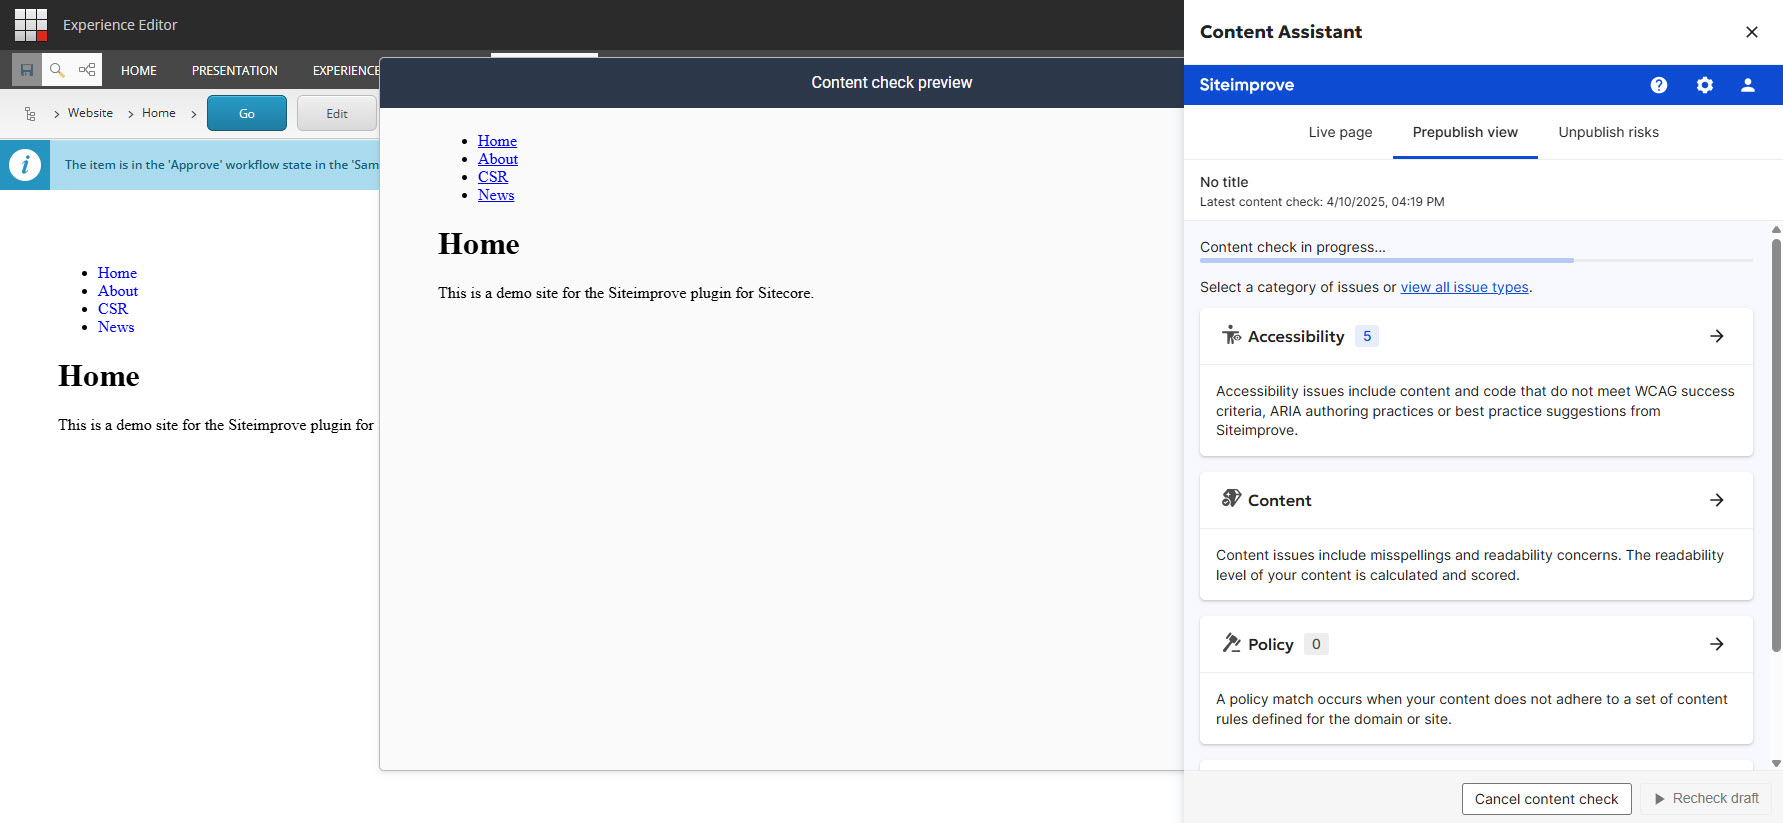
- Once the checks have completed processing, you can see the results of the checks. See Overall Prepublish Check Usage for more on general Prepublish check usage.
- Rerunning a Prepublish check - If you want to rerun a check, with newer versions of the plugin, you should be able to select the "Recheck draft" button in the plugin overlay window. For older versions of this plugin, you may only be able to run one Prepublish check once per page load. If you have already run a check, you may need to refresh the page to start a new Prepublish check. Note: The "Recheck" option under the Siteimprove menu in the top bar does not rerun a Prepublish check. It rechecks the published page in the Siteimprove platform for content that has been published and scanned in the Siteimprove Platform.
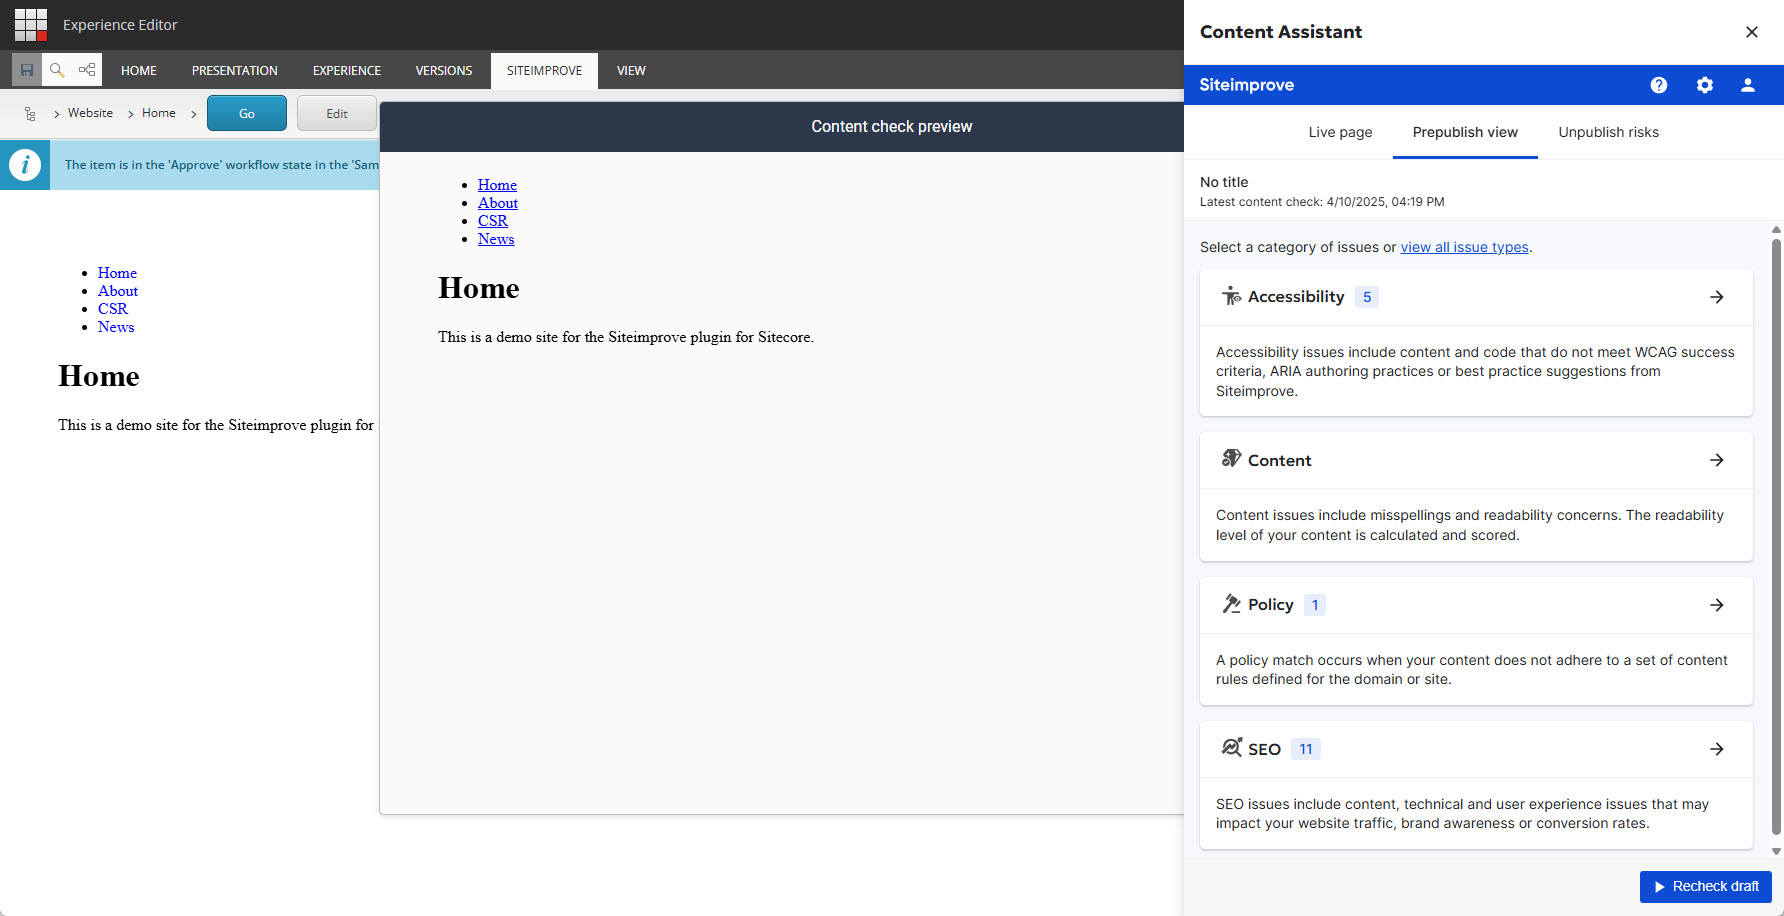
- Rerunning a Prepublish check - If you want to rerun a check, with newer versions of the plugin, you should be able to select the "Recheck draft" button in the plugin overlay window. For older versions of this plugin, you may only be able to run one Prepublish check once per page load. If you have already run a check, you may need to refresh the page to start a new Prepublish check. Note: The "Recheck" option under the Siteimprove menu in the top bar does not rerun a Prepublish check. It rechecks the published page in the Siteimprove platform for content that has been published and scanned in the Siteimprove Platform.
Did you find it helpful? Yes No
Send feedback