Verify and use the Siteimprove Sitecore plugin
Summary
This article explains how to verify that the Siteimprove Sitecore Plugin is installed correctly and how to use it inside Sitecore to access Siteimprove checks, reports, and recheck options for published pages. The plugin lets users review Siteimprove insights directly in the Sitecore editing workflow.
Overview
The Siteimprove Sitecore Plugin allows content teams to view Siteimprove information from within Sitecore, including accessibility, SEO, content quality, broken links, spelling, readability, and related optimization insights depending on enabled services. Users can confirm the plugin is available by checking for the Siteimprove overlay, ribbon tab, or command in Sitecore, then use the plugin to sign in, review page-level results, and recheck published pages after updates.
Verification
Verify CSP configuration
- Open browser DevTools on “/sitecore.”
- Go to Content Editor and open your site home page.
- Open the browser DevTools Console and verify there are no CSP/CORS violations and no blocked requests to required Siteimprove domains.
Validate plugin UI in Content Editor and Experience Editor
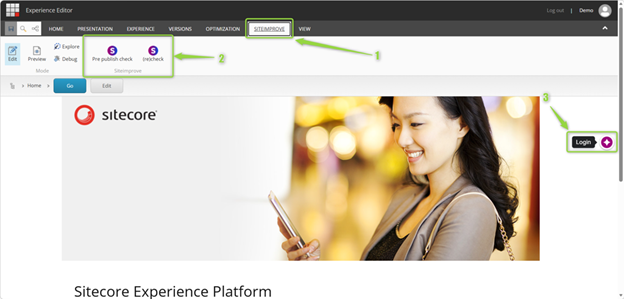
The overlay box should float to the right by default. It will show the option to login if not already logged in with your Siteimprove Credentials.
The Siteimprove tab and Pre publish check and (re)check commands should appear in the ribbon.
Screenshot of Plugin in Experience Editor:
Screenshot of Plugin in Content Editor:
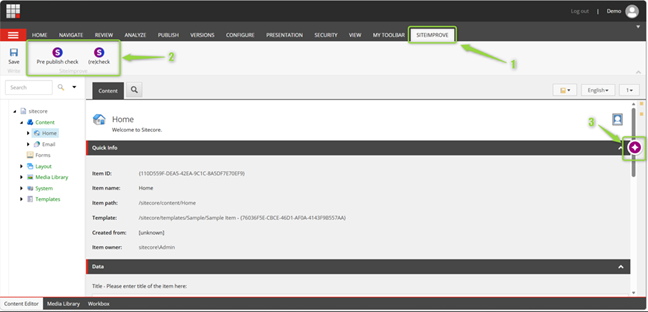
Siteimprove will only be enabled on items with layout assigned.
Verify plugin appears only for users with required role membership
Verify Plugin expected behavior
Siteimprove plugin overlay
The overlay box allows a user to log in to Siteimprove with a username and password. 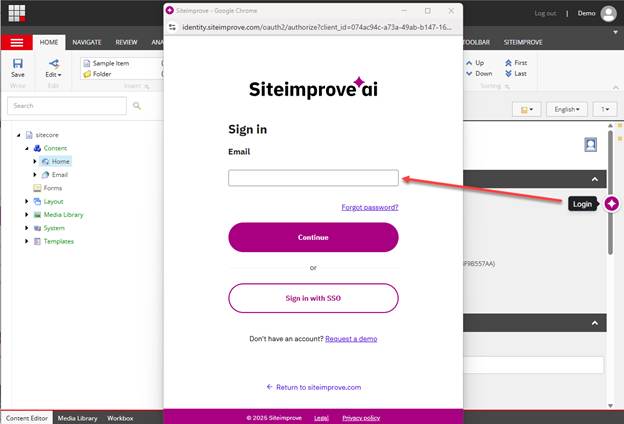
View page data in the overlay
Once you log in, you will see data displayed under the plugin overlay. The overlay will initially be collapsed down. If the corresponding page is scanned in the Siteimprove platform, it will show the number of issues the page has.

If it is not scanned, it will show a question mark and say page not found. This is expected behavior, but if you have the Prepublish feature, you can scan the unpublished draft page in preview mode.

You can click on the collapsed-down overlay to expand it out and see the data from the Siteimprove Platform on that page under the “Live page” and “Unpublish risks” tabs. 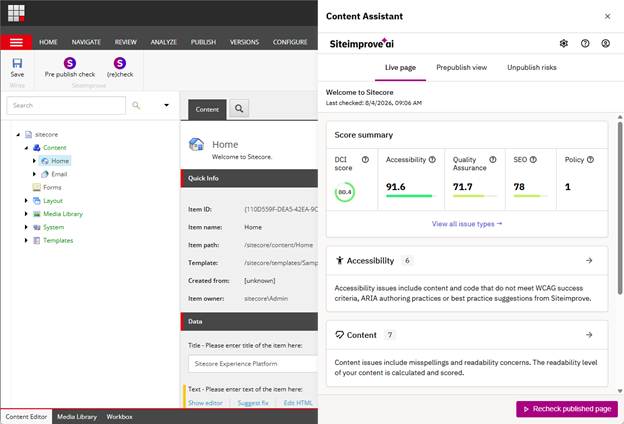
If the item has not been published yet, the “Live Page” tab will not show data until the page is published and checked in the Siteimprove platform.
Check unpublished content with Prepublish
If you have the Prepublish feature (available with a Siteimprove subscription to Prepublish), under the “Prepublish view” tab, you can check the content with the Prepublish check option prior to being published when a page is in draft status. If not, you can publish the page and wait for the next scheduled full site crawl or, for more immediate results, perform a Single Page Check within the Siteimprove platform for the page. 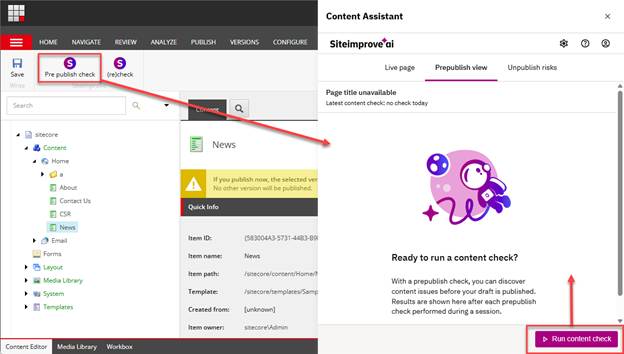
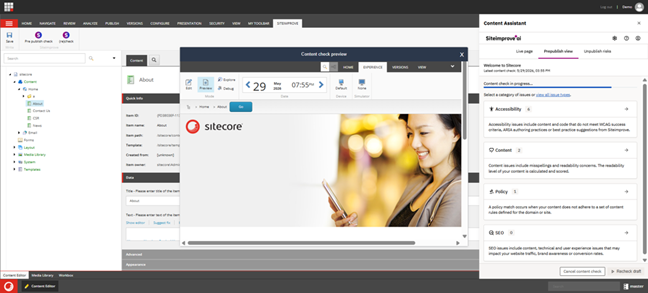
Once you select the “Prepublish” or “Run content check” button, which should both kick off a Prepublish check, the check will process, and results will begin to display for the checks that can be performed on the Preview with the Prepublish feature. Also, a Preview window should appear where the issues found via the check that are highlightable can be highlighted. 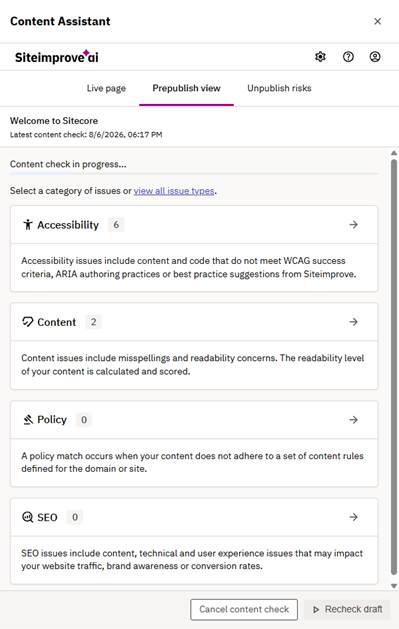
Recheck a live page
The (re)check command allows users to recheck pages within the Siteimprove platform to update the data under the “Live page” tab. This option is only available for pages that have previously been checked within the Siteimprove platform. This is helpful if something changed on the live site since the last full site scan. 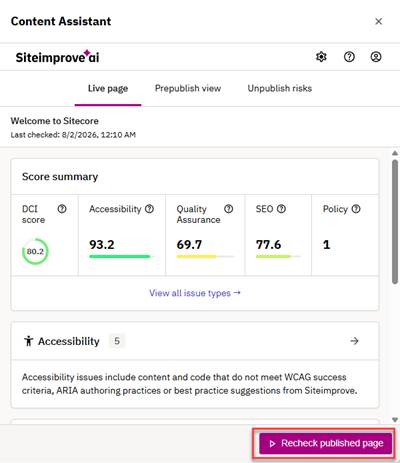
Confirm generated URLs match expected live domains, language behavior, and virtual folder behavior.
To verify that the module is using the correct site settings item, the browser console displays, in debug mode, the data sent to Siteimprove, including the item URL. To view the URLs, enable verbose-level messages.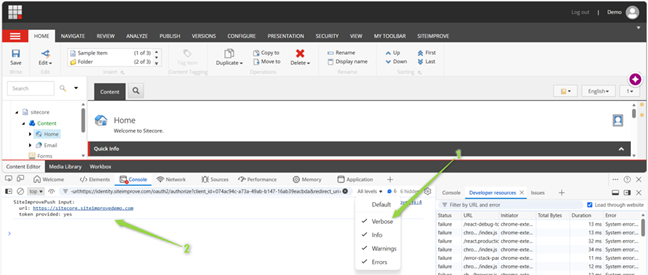
Verify each mapping site item independently in multi-site setups.
Prepublish Checks (Optional)
Prepublish checks are an optional feature of the plugin. If enabled, the feature allows you to check draft content before being published live. This feature requires a Subscription to the Prepublish. If you are unsure about your subscription status, check with your Customer Success Executive.
To enable Prepublish checks:
- Set up an API user and API key to be used for the integration, following the steps here: How to connect to the Siteimprove API.
- Enter the API username and API key under the Siteimprove Setting item under the settings path: /sitecore/system/Modules/Siteimprove/Siteimprove setting
To perform a Prepublish check:
- To check a page before publishing, use the Siteimprove menu item 1 in Sitecore and choose the Pre-publish check option 2.
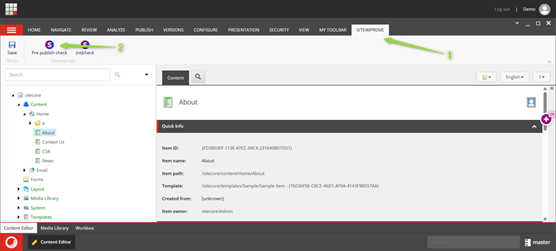
- This initiates the check and opens a preview of the page as it will appear when published. When the checks have completed, the plugin will have the results, and items can be highlighted in the preview window.
Related Articles
Did you find it helpful? Yes No
Send feedback